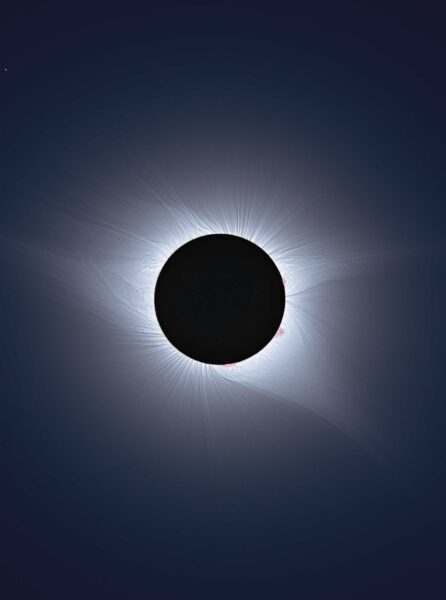
This innovative astrophotography technique can pull out stunning detail in the solar corona.
Sean Walker / Sky & Telescope
Photographing solar eclipses is one of the most challenging forms of astroimaging. It requires a great amount of advanced planning, from organizing the equipment you tow along on your voyage towards totality, to recording a series of exposures that capture the huge range of brightness displayed by the Sun’s ethereal corona. It’s even trickier if you hope to reveal complex magnetic loops that are hidden within the corona. Fortunately, digital photography has made this type of high-dynamic-range (HDR) imaging a bit easier. Here’s a technique I use with Adobe Photoshop that works on solar eclipse photographs taken through most any lens or telescope.
A Good Plan
Part of the trick for revealing the entire dynamic range of the solar corona is to shoot bracketed exposures. Because the corona spans an extremely wide range of brightness, it’s impossible to record all the coronal detail in a single exposure. Prominences visible along the eclipsed Sun’s limb are best captured in very short exposures of typically 1/500 second or less in an f/5 optical system, whereas photographing the outermost extent of the corona requires keeping the camera’s shutter open for up to 1 or 2 seconds, completely overexposing details within the inner corona.
Recording the full range of the corona’s brightness requires shooting a rapid-fire sequence of bracketed exposures spanning the two extremes and then combining the shots into a single, HDR image with image-processing software. There are several good ways to shoot the bracketed exposures, but the most efficient is to either employ a camera that has built-in auto-exposure bracketing (AEB), or use a laptop computer with camera-control software such as Eclipse Orchestrator to make the exposures. A helpful list of cameras that include auto bracketing is available at Photomatix.
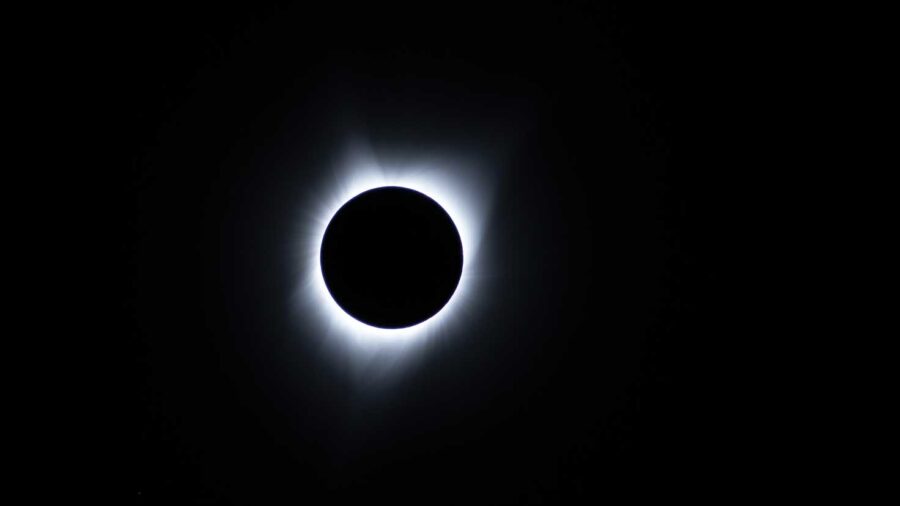
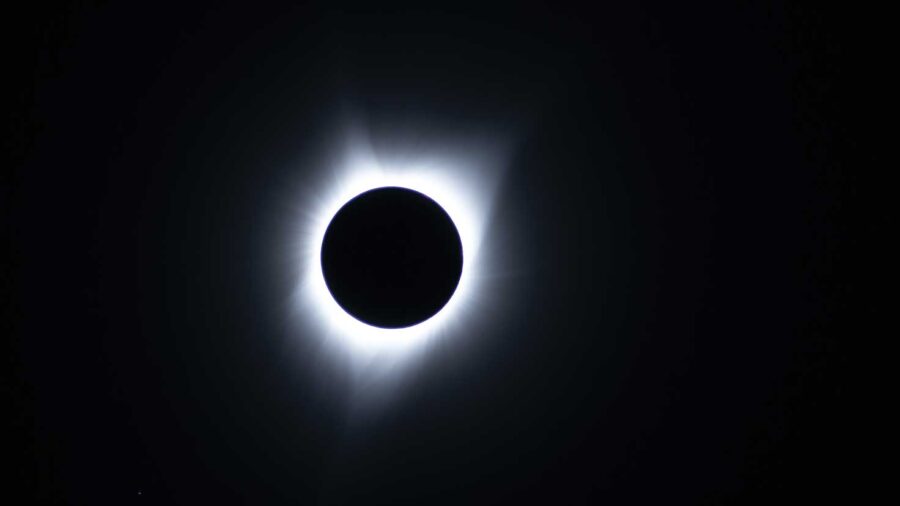
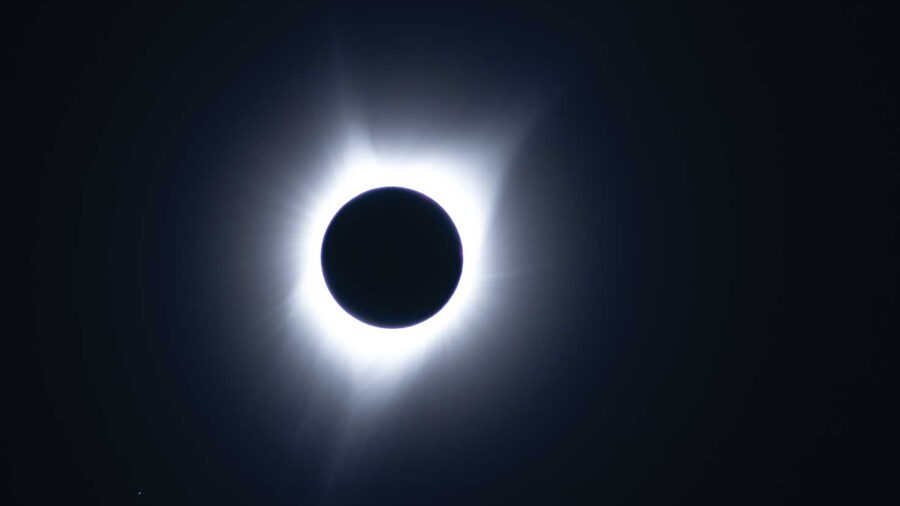
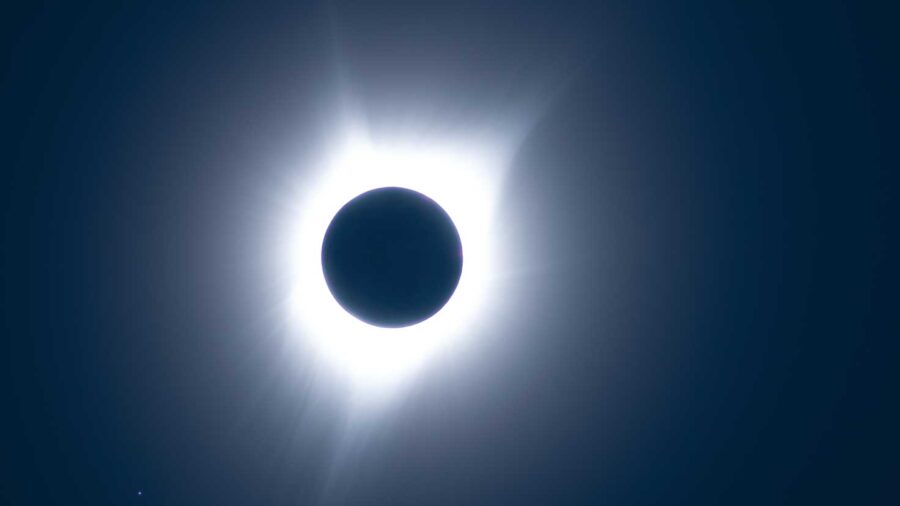
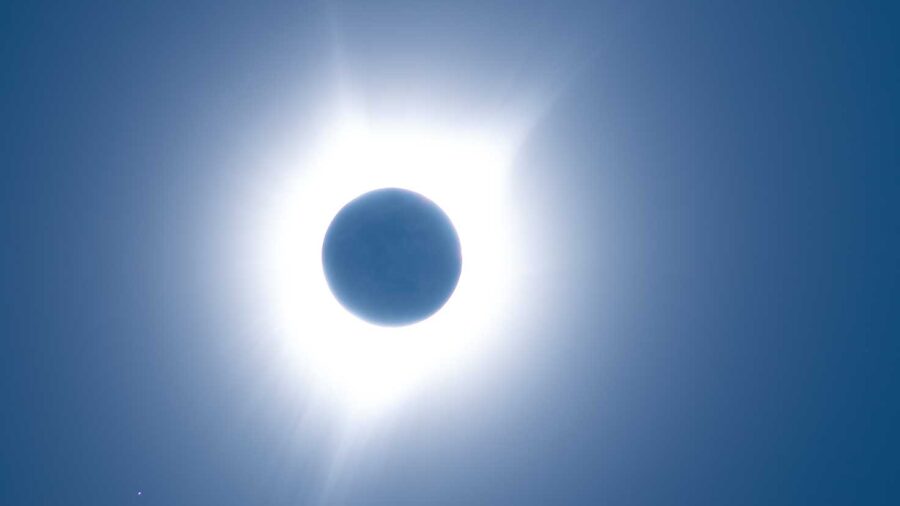
The individual exposures as captured range from 1/500 to 1 second.
Sean Walker / Sky & Telescope
My best results so far have involved a set of at least seven separate exposures ranging from around 1/500 to 1 second. The more exposures in a bracketed set, the smoother the transition between the individual exposures will appear in the final result. It’s also better when you shoot many of these bracketed groups of exposures during totality so that you have lots of images to combine, greatly reducing noise in your final result.
I highly recommend tracking the Sun while you’re shooting. Much like when stacking deep-sky astrophotos, alignment of your individual exposures is key to producing the best results. Aligning untracked eclipse images is time consuming because it can be difficult to find precise reference points such as background stars in all the images, particularly the shortest exposures. No software I’ve tried can automatically detect stars and align solar-eclipse pictures. Shooting with your camera on a well polar-aligned tracking mount makes it much easier to nudge your individual exposures into alignment.
Stacking Brackets
Let’s assume your images are all well-tracked and are ready to stack together. There are several specialized HDR image-processing programs for doing the stacking that I’ve described in the past (S&T: Apr. 2012, p. 75). But stacking aligned images is also relatively quick and easy in the current version of Adobe Photoshop.
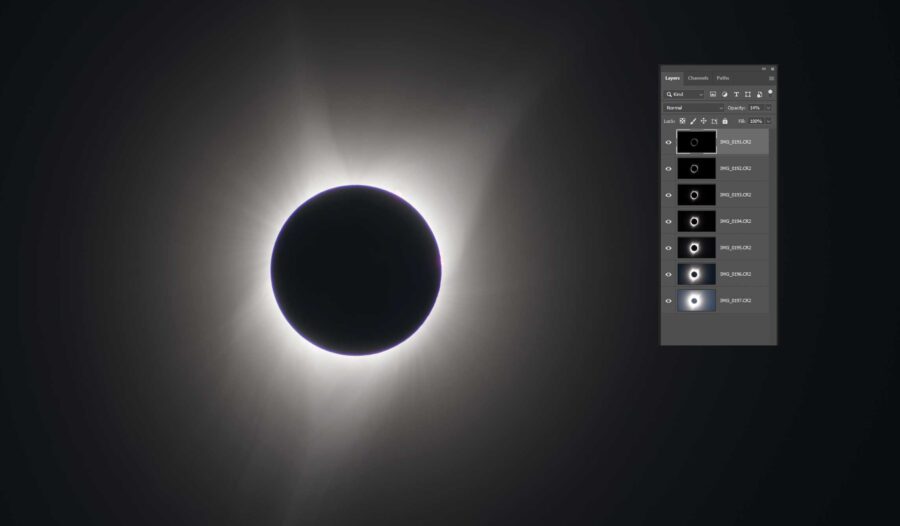
Start by opening the program and selecting File > Scripts > Load Files into Stack from the dropdown menu. The Load Layers window opens, where you’ll click the Browse button at right and navigate to your first bracketed set of exposures. Select them all (you can stack almost any format image files, including RAW camera files). When you click OK, in a few moments your images will be layered one atop the other sequentially in the order you shot them, either shortest to longest or vice versa. If you don’t see the Layers window, open it using the dropdown menu Window > Layers. Any layer that needs additional alignment can be moved by selecting the Move tool, clicking the layer in question, changing the blending mode to Difference, and nudging it into place using the arrow keys on your keyboard.
To smoothly combine all the layers, you need to change the Opacity setting of each layer so that they collectively contribute to the final visible image sequentially from the bottom layer to the top. For my stack of seven exposures, I changed the opacity setting of layers 2 through 7 at the top-right of the Layers window to 50%, 33%, 25%, 20%, 17%, and 14%, respectively, leaving the bottom layer set to 100%. This should produce a smooth image that shows everything from the Moon’s faintly illuminated surface to prominences, extended coronal streamers, and even some of the brightest field stars. Simply choose Layer > Flatten Image and save the result as “group 1.tif”.
Sean Walker / Sky & Telescope
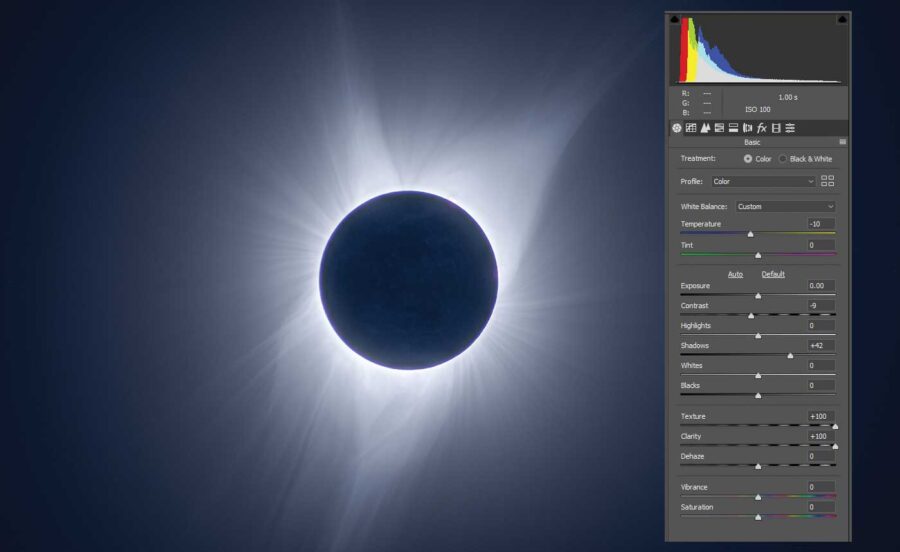
If your goal is a natural-appearing image of totality, a great result can be had by just tweaking this stacked image using Adobe Camera Raw (Filter > Camera Raw Filter). This filter lets you adjust the color balance, increase the texture and clarity, and also increase the shadow detail until you start to see some features in the inner corona as well as the Moon’s surface. Setting both the Texture and Clarity sliders to 100 and the Shadows to 50 produces an eye-catching result that is very close to what the eclipse looks like to the unaided eye. Adjust the color balance, save the result with a new file name (group 1ACR.tif), and you’ll have a great image of the event. But you can do much more with your bracketed set.
Sean Walker / Sky & Telescope
Revealing Coronal Loops
To bring out additional fine detail in the corona, open the first stacked image (group 1.tif) and blur it using the Gaussian Blur filter (Filter > Blur > Gaussian Blur). In the filter window, change the Radius to 3 or 4 pixels (the larger value will add more contrast to your completed photo, though at the cost of suppressing the smallest-scale features), depending on the focal length of the optics you shot with. Save this image with a name that reflects the process used, such as “group 1 blur.tif”.
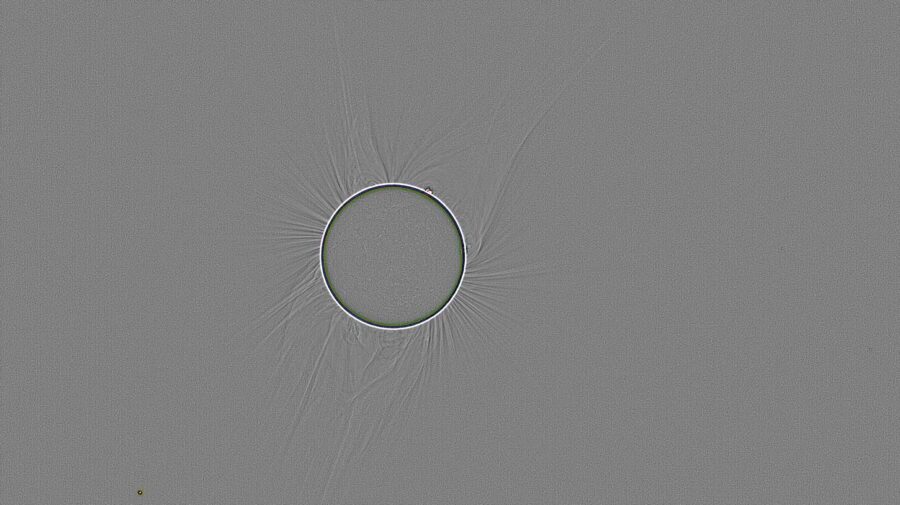
Keep this blurred image file open and reopen the original stacked image (group 1.tif). Next, apply the blurred image to the original by selecting Image > Apply Image from the dropdown menu. In the Apply Image command window, first change the Source from group 1.tif to group 1 blur.tif. In the Target section, change the Blending mode to Subtract, and increase the offset to 128. Click OK, and a very low-contrast map of small-scale differences between your original image and the blurred version remains, though it will appear gray with a dark ring where the limb of the Moon is located. We need to significantly compress the dynamic range of this image by opening the Levels tool (Image > Adjustments > Levels). In this window, change the low value slider at left to 126, and the high value slider at the right to 130, and click OK.
Sean Walker / Sky & Telescope
This mapped image should now display the edges of coronal loops and streamers, and some background stars, albeit with a lot of noise. Save this image as “group 1 subtract.tif”.
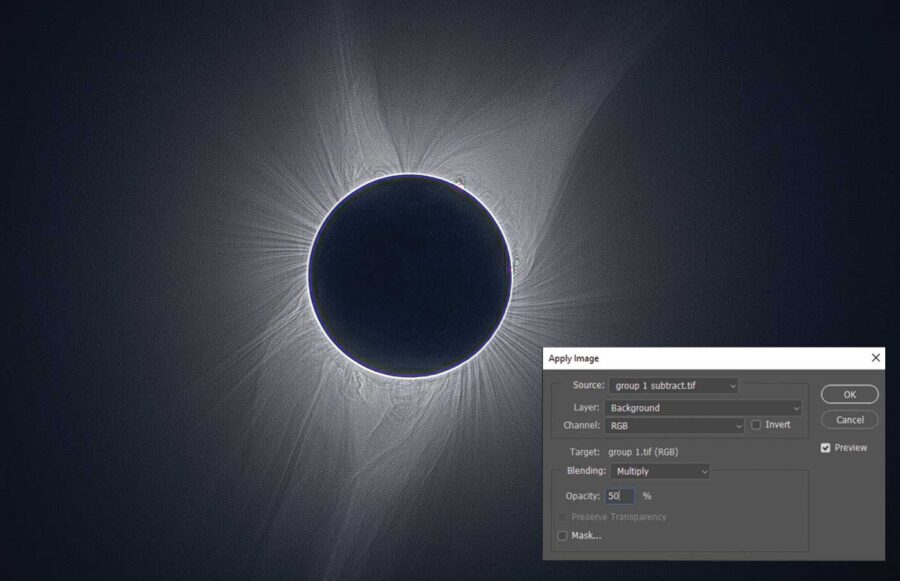
Next, you need to apply this detail map to the original stack. Open group 1.tif and again select Image > Apply Image from the dropdown menu. Here you have several options depending on how aggressive you want the processing to appear. Change the Source to group 1 subtract.tif and the blending mode to Multiply. Immediately, you’ll see lots of high-contrast loops within the corona, though it will be extremely noisy and rather “overcooked.” When applying this process, I prefer to lower the Opacity to about 75% before clicking OK.
Sean Walker / Sky & Telescope
This result displays a lot of coronal detail but is very noisy. You can reduce the noise by opening the Camera Raw Filter again and dropping the Texture slider to -50.
If I only have one set of bracketed exposures, the only things left to do are to adjust the color balance and fix the Moon as well as the over exposed ring around its limb, which is an artifact of this extreme sharpening method. I find that stacking several sets of bracketed exposures reveals crisper details in the corona without needing to employ aggressive noise-reduction methods on the final result. The results of stacking multiple bracketed sets are superior, though the Moon becomes slightly smeared as it moves across the solar disk on each progressive set of images.
Combining several stacked and aligned sets of processed exposures is done the same way as stacking the initial sub-exposures using File > Scripts > Load Files into Stack. As before, change the opacity of each layer so that together they progressively contribute to the final view. When you’re pleased with the result, flatten the layers by selecting the dropdown menu item Layer > Flatten Image.
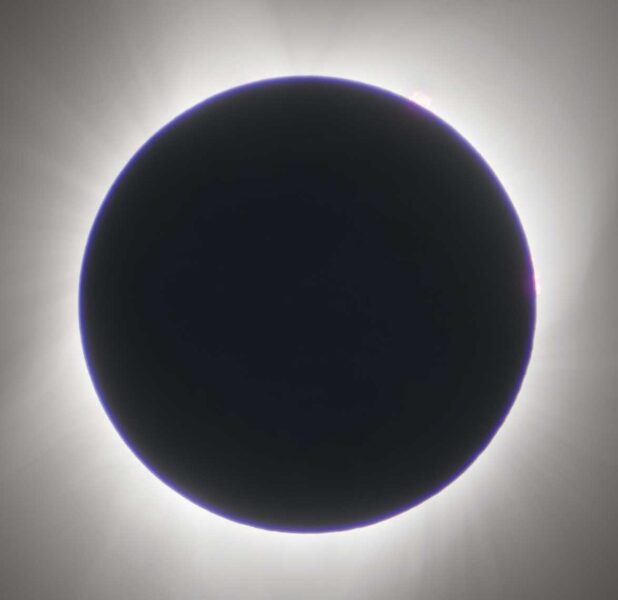
The last step is to layer the Moon back in and address the bright artifact around its edge. I find this requires two versions of the same image processed slightly differently. First, open your stacked but unprocessed image and crop it as a square around the Moon. Be sure to leave about 50 pixels or more beyond the lunar limb, and save the result at “moon.tif.”
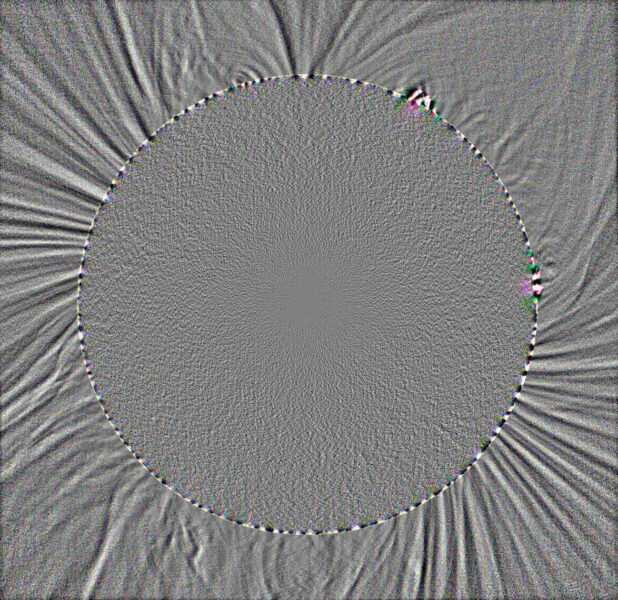
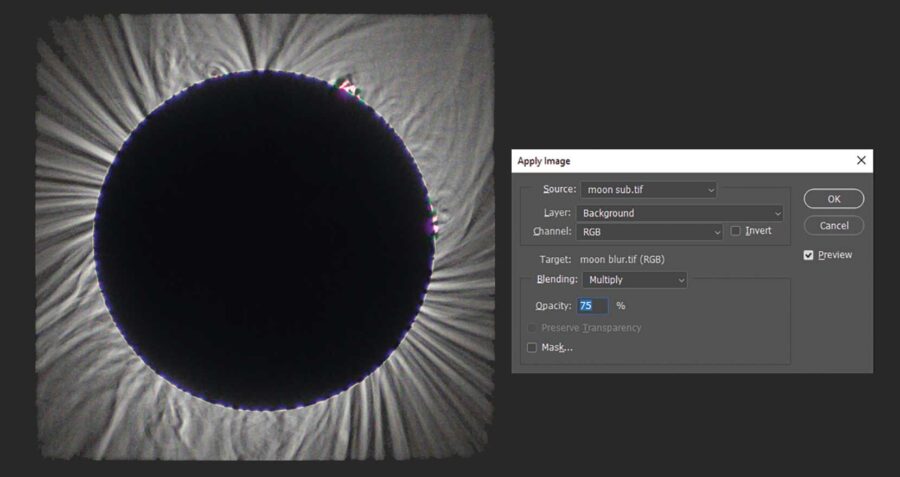
Let’s blur this image but in a slightly different way using Filter > Blur > Radial Blur. In this new window, select Spin as the Blur Method, Quality Best, and change the Amount to 3 and click OK. Save this as a new file titled “moon blur.tif”.
At this point, you process the Moon image just as you did the full stacked eclipse image by first applying the radial-blurred image to create the subtracted difference map. Then compress the levels, save the result, and apply it to the Moon picture again using the Overlay blending mode (and reduce this to 75% opacity). The resulting Moon image will have the coronal details visible almost to its limb, but the Moon itself will appear odd due to the radial blurring.
Sean Walker / Sky & Telescope
Sean Walker / Sky & Telescope
Sean Walker / Sky & Telescope
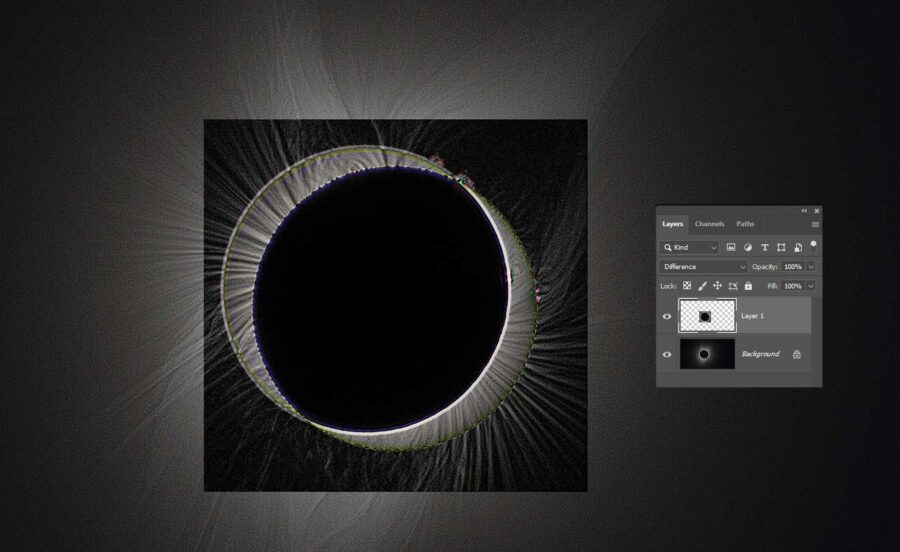
Now copy this sharpened lunar image (Select > All, Edit > Copy), open up your single stacked and processed eclipse image, and paste this new processed Moon image as a new layer. To align it to the base image, change the layer Blending Mode in the Layers window from Normal to Difference. Using the Move tool, move the top layer until the majority of the two images cancel each other out and turn black, except for the ring around the limb of the Moon. When you’re satisfied, make a circular selection with the Elliptical Marquee tool that includes the Moon and the ring artifact. When you’ve circled it all, choose Select > Inverse from the dropdown menu and hit the backspace key on your keyboard. When you change the layer blending mode back to Normal, the bright ring should be reduced to a thin line.
Sean Walker / Sky & Telescope
At this point, I open the stack I saved that was processed using the Camera Raw filter (group 1ACR.tif), select the Moon, and then paste this into the stack. After aligning the final Moon layer, flatten the image and perform any final adjustments such as noise reduction and color balance.
The end product is an image showing the entire range of brightness and detail captured in your images. If you’re planning on photographing an upcoming eclipse, it wouldn’t take much to add bracketing into your routine. Images like these allow us to see extremely small tonal variations, as well as stars much fainter than were noted during the event. Good luck!
Find planning tips and resources on our 2024 Total Solar Eclipse portal!
 1
1
Comments
Rick Scott
July 9, 2023 at 4:36 pm
Excellent article. Do you have a PDF version available?
You must be logged in to post a comment.
You must be logged in to post a comment.