 0
0Eclipse photography has never been easier. With a bit of planning and effort, almost anyone can capture the celestial show using only modest equipment. Here are some pointers on how to obtain your own souvenir portrait of a solar eclipse.
Eye Safety First
The most important thing to keep in mind when trying to view the partial stages of the eclipse is to never look directly at the Sun without proper eye protection. This means wearing solar viewing glasses, or “eclipse shades,” when viewing the Sun naked-eye, as well as fitting your cameras, binoculars, telescopes, and even finder scopes with special solar filters. Failure to do so can result in serious eye injury or permanent blindness. A No. 14 arc-welder’s glass filter is also acceptable. Ordinary sunglasses and polarizing or neutral-density (ND) filters used in regular photography are not safe and should never be used.
The American Astronomical Society has published a list of reputable vendors of solar viewers and filters; the organization has also issued a timely warning about unsafe, counterfeit solar viewers flooding the market, so be sure to check yours first before using them.
Use the Right Equipment
The type of camera lens you use will depend on what you want to record. To shoot wide-angle shots of the sky at totality with a digital single-lens reflex (DSLR) camera, a standard 50-millimeter lens is all you need. Although it gives only a minuscule (0.5 mm in diameter) image of the Sun on a full-frame (35-mm-format) DSLR sensor, it is well suited to capturing the totally eclipsed Sun and the surrounding sky.
For dramatic effect, try to include foreground objects in the scene such as tall trees, monuments, and other interesting or famous landmarks. Fish-eye lenses capture the whole sky and are especially good for documenting the approach and retreat of the umbra (lunar shadow), as well as the 360° sunset-twilight colors that ring the horizon.
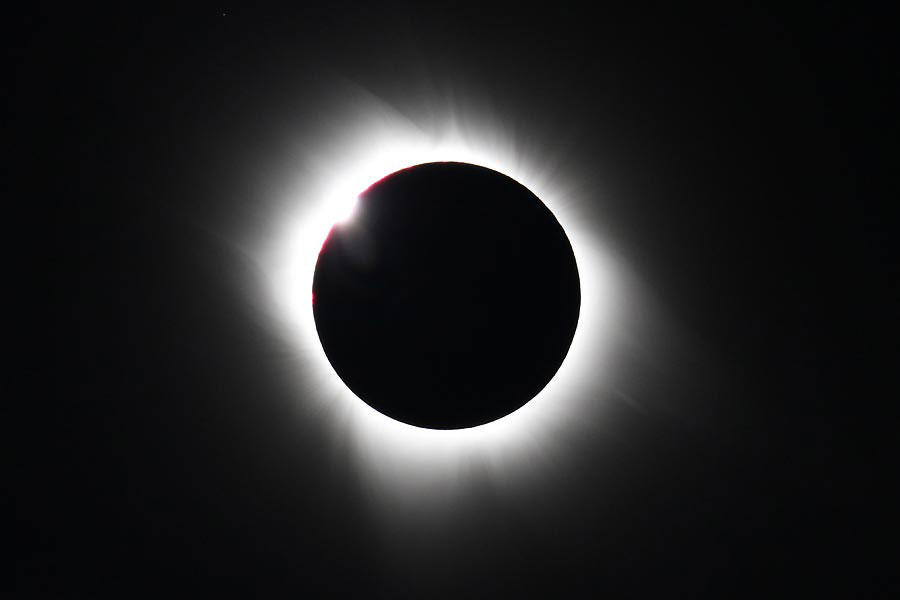
However, if you want the Sun’s disk to be reasonably large in the field of a full-frame DSLR, you will need a telephoto lens or telescope with a focal length between 500 and 2,000 mm on a stable mount. A 1,000-mm lens yields a solar image 9.2 mm across and is perfect for framing the outer corona, which can easily extend more than ½° from the Sun’s limb.
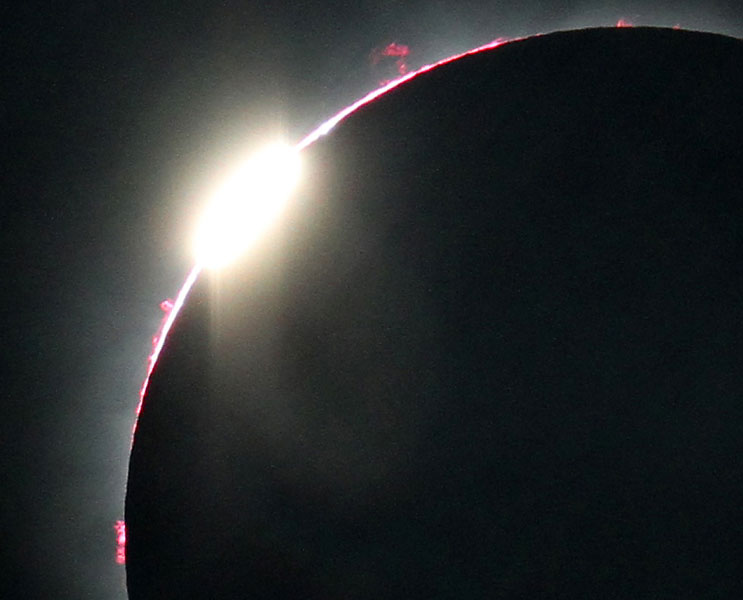
For close-up shots of the eclipse’s partial phases, Baily’s beads, diamond rings, chromosphere, prominences, and inner corona, you’ll want a lens or telescope with about 2,000 mm focal length. This produces a solar image approximately 18 mm in diameter, which nearly fills the field of a full-frame sensor. (Focal lengths longer than 2,600 mm will not show the entire solar disk.)
You can double the effective focal length of some telephoto lenses with a 2× teleconverter; not all lenses are compatible with them, though. With a telescope, you can add a Barlow lens or use the afocal imaging or eyepiece-projection technique. For any particular focal length, the diameter of the Sun’s image is equal to focal length divided by 109.
DSLRs that feature APS-C-size CMOS sensors (approximately 22 × 15 mm in the Canon EOS 80D and 24 × 16 mm in the Nikon D3400) will show a smaller field for a given lens due to the focal length crop factor of 1.5×.
Take some test shots on the Sun ahead of the eclipse to determine the best exposure to use with your particular optics and filter combination. This will also help uncover any issues with focusing, internal reflections, and vignetting (field darkening along the edges of the frame). You don’t want any unpleasant surprises on eclipse day.
The Importance of Focusing
Imelda Joson and Edwin Aguirre
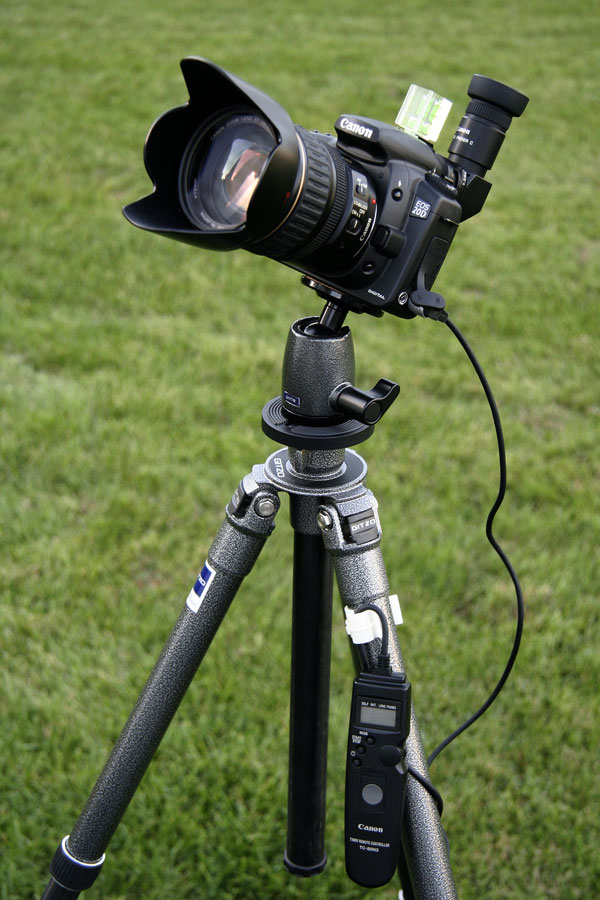
Don’t let poor focus ruin your eclipse photographs. This is especially important when using telescopes and long telephoto lenses, which do not have a fixed infinity (∞) setting. When using older-model DSLRs, you can attach an optional 2.5× right-angle magnifier to the camera viewfinder to assist with focusing. Newer models offer a “live view” feature that allows you to see exactly what the camera sensor sees and magnify the image up to 10× for accurate focusing. (Check your camera manual on how to do this, as it varies by camera model.)
Once you achieve precise focus, place a piece of adhesive tape across your lens’s focus ring or lock the telescope’s focus knob to prevent it from accidentally being moved during the eclipse. The same technique also applies when setting zoom lenses, which can slip without warning, especially when aimed high in the sky. Be sure to recheck your focus as the eclipse progresses, since changing temperature can cause the focus to shift slightly.
Remember: It’s the quality that counts, not the quantity. It’s better to have a few perfectly sharp images of the Sun’s diamond ring and corona than a dozen poorly focused ones.
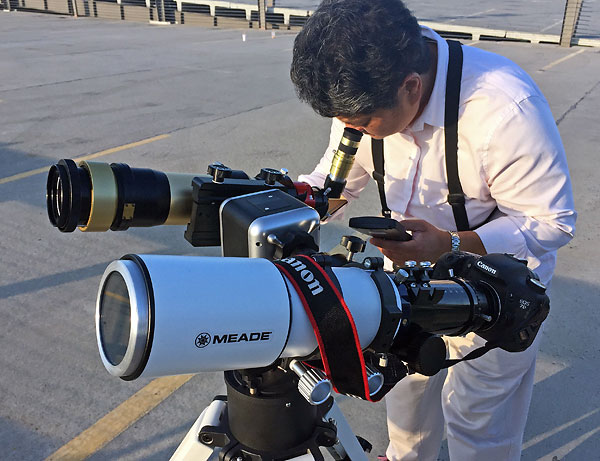
Mounts
Imelda Joson and Edwin Aguirre
Whether you’re traveling by land or air to your observing site, try to keep your mount as portable, light, and easy to assemble and operate as possible. Portability is essential if you need to relocate in a hurry to escape clouds.
If the Sun’s altitude will be high at your location during totality, make sure your camera tripod can be aimed that high. A fluid pan head with slow-motion controls offers smooth guiding when you are manually tracking the Sun, which moves at about ¼° per minute across the sky.
To improve a tripod’s stability, hang a jug of water or a duffel bag filled with sand or rocks under the center post. You can also wrap plastic bags of sand on each leg or set the tripod on rubberized footpads to dampen vibrations. Choose your site so it’s shielded from direct breeze; erect a sturdy windbreak, if needed.
If you’re using a long-focus telescope or super telephoto lens on a regular tripod, the Sun would drift out of the field of view at such a fast clip that you could lose precious seconds of totality just trying to keep up with the Sun.
The solution would be to use a heavy-duty, properly polar-aligned equatorial mount with manual slow-motion controls or motor drive system. The motor drive allows you to concentrate on important tasks like focusing, adjusting your exposure settings and taking the shots by keeping the Sun centered constantly in your field of view. Here’s an easy, quick technique for polar-aligning your mount in broad daylight.
But if you don’t want to deal with polar alignment, external power supply or telescope counterweights, the alternative would be to use a battery-powered computerized Go To altazimuth mount, such as iOptron’s AZ Mount Pro This compact and lightweight mount has built-in sensors and GPS receiver for easy setup in the field, which is ideal in case you need to relocate fast due to approaching clouds. All you have to do is to level the unit on its tripod, turn the power on and, after a quick initialization, the mount is ready to use.
Camera Settings and Techniques
Set your camera’s image quality to its highest resolution, preferably uncompressed RAW format, and switch the camera controls to fully manual (M). Don’t rely on your camera’s autofocus and auto-exposure functions, especially during totality.
Turn off the flash, if your camera has one, since it’s useless on the eclipse. Use a high ISO setting (400 or higher) to keep your exposures short (less than a second or so). This will help minimize blurry images due to vibrations or tracking errors.
Imelda Joson and Edwin Aguirre
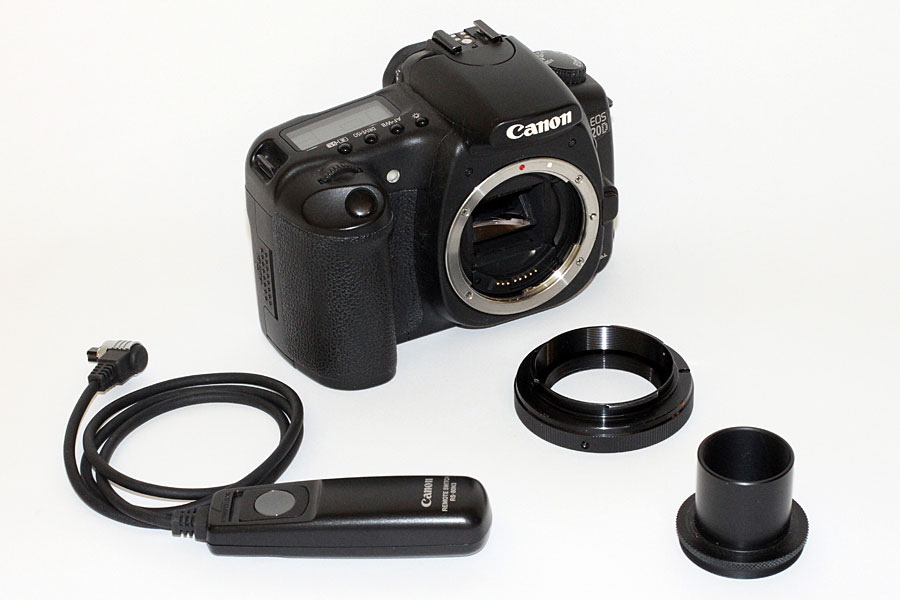
Attach your camera body securely to the telescope focuser using an appropriate T-ring and T-adapter for your camera brand (check with your local camera retailer), and use a long electronic cable release to operate the camera shutter. The slap of the reflex mirror in DSLRs can also produce camera shake, so if possible, use mirror lockup before each shot.
Synchronize the internal clock in your camera with Universal Time so the time stamps with your images are accurate. Reliable time sources you can use for this include the WWV station’s shortwave time signal and the U.S. Naval Observatory master clock. The latest models of DSLRs have a built-in GPS receiver that offers not only a digital compass, but also records your observing site’s longitude, latitude and elevation and the Coordinated Universal Time (UTC) as EXIF file, which is useful for geotagging your eclipse images.
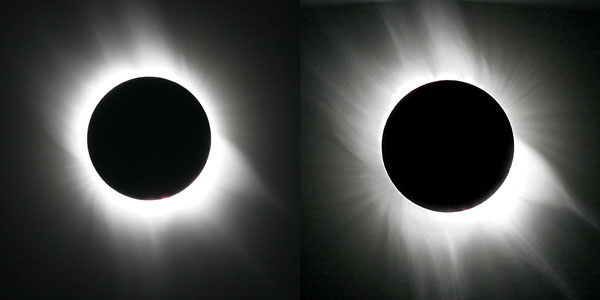
Use the “bracketing” photo technique — that is, taking a series of varying exposures of the diamond ring and the corona — to ensure that some of your shots will produce optimum results. Depending on the effective focal ratio and ISO setting of your telescope setup, use fast shutter speeds so you don’t burn out the prominences and inner corona. Switch to longer exposures to capture the full extent of the coronal streamers. Many DSLRs have an auto exposure bracketing function that changes the exposure up to ±3 f/stops in ⅓-stop increments for three successive shots. Consult your camera manual on how to access this feature.
Be sure to use a high-capacity memory card and a fully charged battery pack. There is nothing worse than running out of memory or battery in the middle of totality. Whether your camera uses a CompactFlash or SD card, get one with the highest capacity and fastest write speed you can afford. This is required especially when you’re shooting in RAW or RAW+JPEG. The price of a 32- or 64-gigabyte card has dropped dramatically in recent years so there’s no reason not to buy them. Also have a spare battery pack handy in case you need to swap it out. Immediately after the eclipse, don’t forget to back-up your files and keep the memory card in a secure place.
Eclipse Videography
Nothing evokes memories of an eclipse better than video — it offers instant gratification in the field unmatched by conventional photography. It also documents the sights and sounds as well as the crowd’s spontaneous reaction as totality begins and ends.
Unlike in the days of bulky, heavy video cameras and VHS cassette tapes, eclipse videographers now have a wide array of compact, high-quality recording equipment to choose from. In addition to DSLRs and smartphones, dedicated camcorders and small action cameras like the GoPro Hero 5 can capture high-definition video as well as high-resolution stills.
Today’s camcorders feature CMOS (complementary metal-oxide semiconductor) detectors that have high sensitivity yet will not be harmed by brief exposures to direct sunlight. Their compact size and light weight make them ideal for travel and for piggybacking on telescopes. There are dozens of models and prices to choose from, with features such as flip-out LCD viewfinders and image-stabilized optics, and they use SD, microSD, microSDHC and microSDXC memory cards.
All camcorders have zoom lenses, some with up to 30× optical and 350× “digital” magnifications. Optical zoom is what matters, since it increases the image scale on the detector. (Digital zoom simply crops in on the center of the view, reducing resolution.) The easiest way to determine the size of the Sun in your camcorder is to shoot it, zooming in to the highest optical power. As with still cameras, you need a proper solar filter over your camcorder lens. If your camcorder doesn’t have enough magnification, consider adding a telephoto conversion lens (3× or more) to the front of the lens. Or shoot through your telescope’s eyepiece.
During the partial phase, you can take 2- to 3-second clips every five minutes or so to produce a time-lapse sequence that compresses the hours-long partial phases into just minutes. High-end camcorders have manual controls for adjusting the gain, f/stop, and “shutter” speed so you don’t overexpose the bright inner corona or cause blooming (streaking) of the image. On eclipse day, be sure to use a freshly charged battery pack and keep a spare battery and memory card as backup.
Final Thoughts
We know it’s difficult, but take a few moments to put down your smartphone or take your eye away from the camera viewfinder and simply enjoy totality with your unaided eyes or through binoculars. We’ve often heard tales of people so engrossed with their imaging that they missed seeing the eclipse visually. In all our eclipse chasing, we’ve always made it a point to catch (between exposures) good glimpses of the spectacle going on above us. No photograph or video can compare with the real thing.
Don’t forget to submit your best eclipse photos and reports to Sky & Telescope. Good luck!
Find more planning tips and resources at our 2024 total solar eclipse portal!
About Edwin Aguirre and Imelda Joson
Former Sky & Telescope editors Edwin Aguirre and Imelda Joson are veteran eclipse chasers and photographers, having organized, led and/or participated in 11 solar eclipse expeditions and tours to North America, Asia, and Africa. For the Aug. 21st eclipse, the couple is heading to the eclipse central line between Riverton and Shoshoni in Wyoming.

Comments
You must be logged in to post a comment.