 5
5Purple haze all in my eyes
Don't know if its day or night
You got me blowin', blowin' my mind
Is it tomorrow, or just the end of time?
- Jimi Hendrix
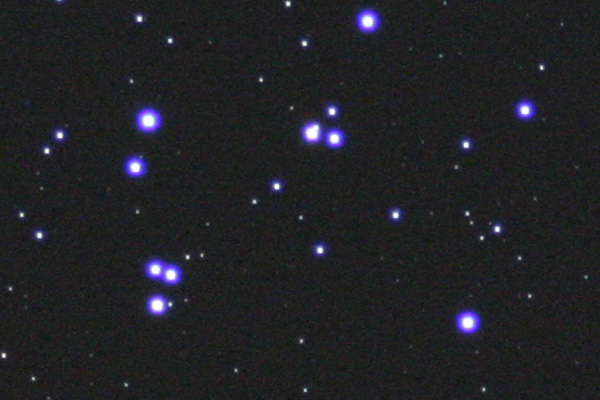
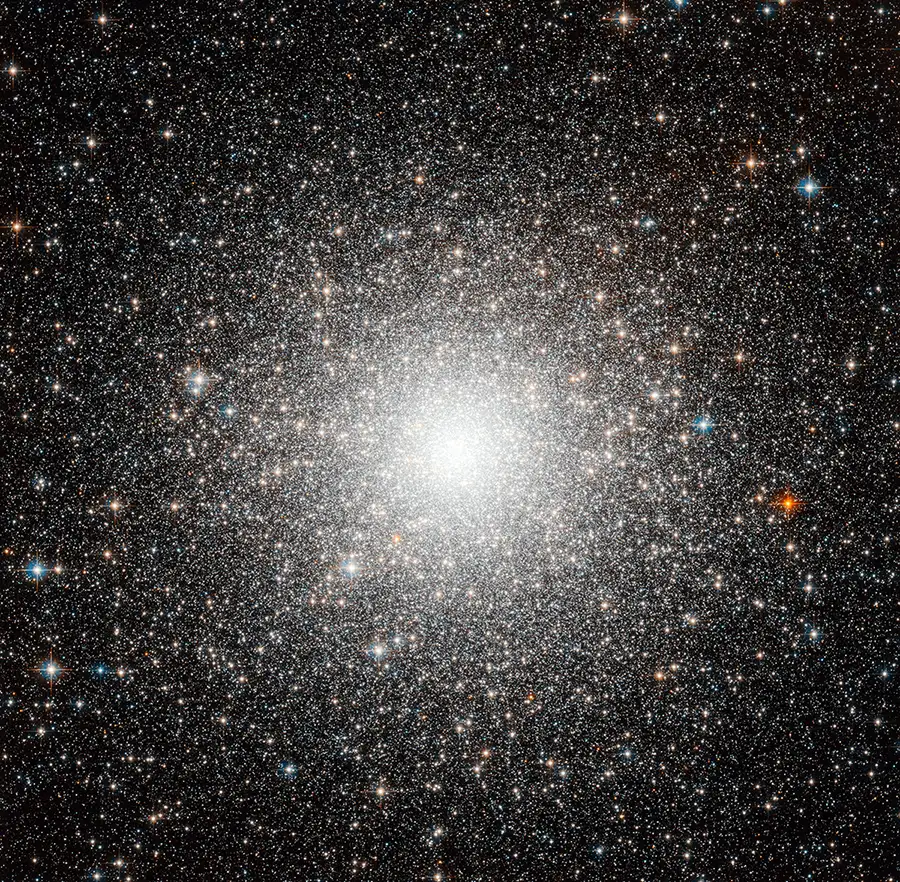
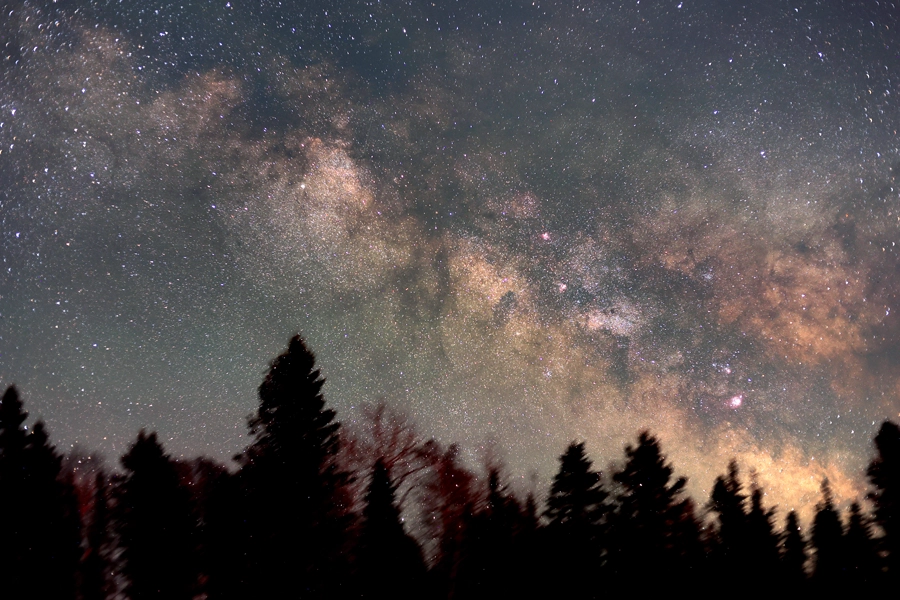
Purple halos around stars can be a problem when shooting with inexpensive camera lenses and telescopes. They come about when refractive optics — optics that contain lenses — don’t focus blue and red wavelengths of light at the same place as the rest of the visual spectrum.
Because these wavelengths focus at different distances based on the refractive index of the glass, star images at red and blue wavelengths will be out of focus and appear larger than the in-focus star images in green light. These out-of-focus red and blue images combine to form a purple color that appears as a halo around bright stars.
Refractive optics in achromatic telescopes focus the wavelengths to which the eye is most sensitive, in the green portion of the spectrum. Because the eye is not as sensitive to the long red and short blue wavelengths, their lack of color correction is not as noticeable visually. But digital cameras will record these wavelengths, particularly in the long exposures common to deep-sky astrophotography.
Apochromatic refractors do a better job of focusing the red and blue wavelengths, but since there is no real definition of what an “apochromat” is, some do a better job than others. Premium camera lenses try to correct red and blue wavelengths by using several elements made from exotic glasses such as Fluorite and ED (Extra-low Dispersion) glass. These optics work well on normal daytime subjects, but star fields are the toughest test imaginable. Unsurprisingly, the quality of the correction is usually directly related to the cost of the lens.
Jerry Lodriguss
Reflective optics, such as in a Newtonian telescope, do not suffer from this problem because there is no refraction involved, so all the wavelengths of light come to focus at the same point.
Star Halo Solutions
There are four solutions to the problem of purple halos in your images.
- Use an all-mirror optical system. This works for telescopes with long focal lengths but not for wide-angle star fields recorded with camera lenses. There simply are no wide-angle mirror lenses for sale because the design is impractical.
- Use only high-end lenses and refractors. This is a very expensive solution and doesn’t even work completely with some lenses.
- Use a minus-violet filter if blue halos are a problem, or a UV-IR blocking filter. This can work well in some cases, but these filters can only be mounted at the front of a camera lens, and it can get expensive to buy a filter for every different diameter lens you have. Additionally, the cutoff on the red may be too short, so you might block a lot of the hydrogen-alpha wavelengths which make red emission nebulae so beautiful.
- The last option is to correct the purple halos during post processing.
Correcting Purple Halos in Photoshop
Here’s an easy way to correct purple halos in Adobe Photoshop CC with Adobe Camera Raw.
Now, here is the weird thing – Camera Raw works differently depending on whether you use it to open a RAW file directly or if you use it after the file is already open. If you use Adobe Camera Raw in Photoshop to open a RAW file, the purple halo correction is not available. So if you’re shooting in RAW format, open the file as usual with Adobe Camera Raw, apply any adjustments, and click the "Open Image" button, which converts the image into the programs working space. Once it’s open, use Camera Raw from the pull-down Filter menu to access the Lens Corrections tab. When working with a stacked linear TIF image out of another program such as DeepSkyStacker, open your image in Photoshop, perform any white balance, non-linear stretching, and gradient removal first, then open Camera Raw to remove any color halos.
- From the pull-down menus at the top of the program, select Filter > Camera Raw Filter.
- Enlarge the image to 100% to make the halos easier to see.
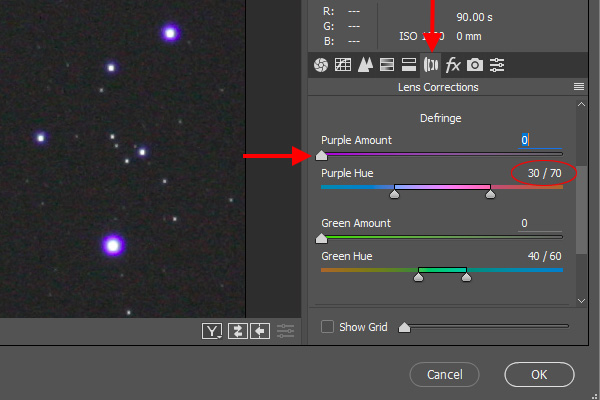
- Go to the Lens Corrections tab.
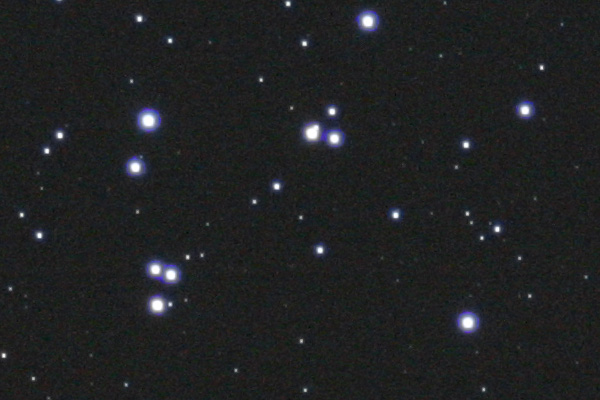
- Under Defringe, slide the Purple Amount slider to the right until the halo is gone.
This also works with red or blue halos. To reduce a red halo, which can be particularly problematic when using a modified DSLR combined with light-pollution filters, slide the two Purple Hue sliders over to the right until they read about 50 / 100, then adjust the Purple Amount slider. For a blue halo, slide the Purple Hue sliders over to the left.
After using the Camera Raw Filter, you really will want to say “Excuse me while I kiss the sky!”
About Jerry Lodriguss
Jerry Lodriguss has been an amateur astronomer and astrophotographer since 1972. He worked professionally for more than 30 years as a photojournalist and sports photographer. Today, Jerry is an author, photographer and contributing editor to Sky and Telescope magazine. Check out Jerry's images and astrophotography at http://www.astropix.com.

Comments
foscojo
March 1, 2017 at 9:22 am
Jimi Hendrix (not Jimmy)
You must be logged in to post a comment.
Monica Young
March 1, 2017 at 10:06 am
Thanks for the catch, I've fixed the typo.
You must be logged in to post a comment.
Jerry LodrigussPost Author
March 4, 2017 at 5:32 pm
Hi Trevor,
Thanks!
Jerry
You must be logged in to post a comment.
AstroBackyard
March 4, 2017 at 5:15 pm
Excellent article Jerry! When I saw the title, I was thinking "I hope I am doing it right" - after seeing you use the same method, I feel a lot better. I appreciate all of the knowledge you've shared about AP over the years!
You must be logged in to post a comment.
Richard-Lighthill
January 20, 2020 at 11:49 am
Good news for us who haven't bowed to Photoshop yet: darktable (www.darktable.org - freeware!)
darktable allows one to open the TIFF files from DeepSkyStacker (freeware, again)
Follow this procedure:
Under the "Correction" group (right hand side) find "Defringing".
Zoom in on an offending star
Select the "defringe".
Select the operation mode "static threshold (fast)"
Move the "edge detection radius" all the way to the right.
Move the "threshold" slider all the way to the right.
To save the resultant image: hit the Control key + e
Choose your file type and location
Finally, open your favorite photo imaging software (like GIMP, also freeware) and finish your image off.
Here's to clear skies and freeware!
You must be logged in to post a comment.
You must be logged in to post a comment.