 0
0Latest-generation CMOS cameras make astrophotography easier than ever.
Sean Walker
Sean Walker
Deep-sky astrophotography sure has changed since the turn of the 21st century. Most readers are familiar with the rise of charge-coupled devices (CCDs) and how they displaced film as the primary method of taking pictures of the night sky (as well as all other types of photography). Thanks to their high quantum efficiency, electronic detectors could record fainter targets in less time than ever before, which quickly made them the tool of choice for amateur and professional astronomers alike.
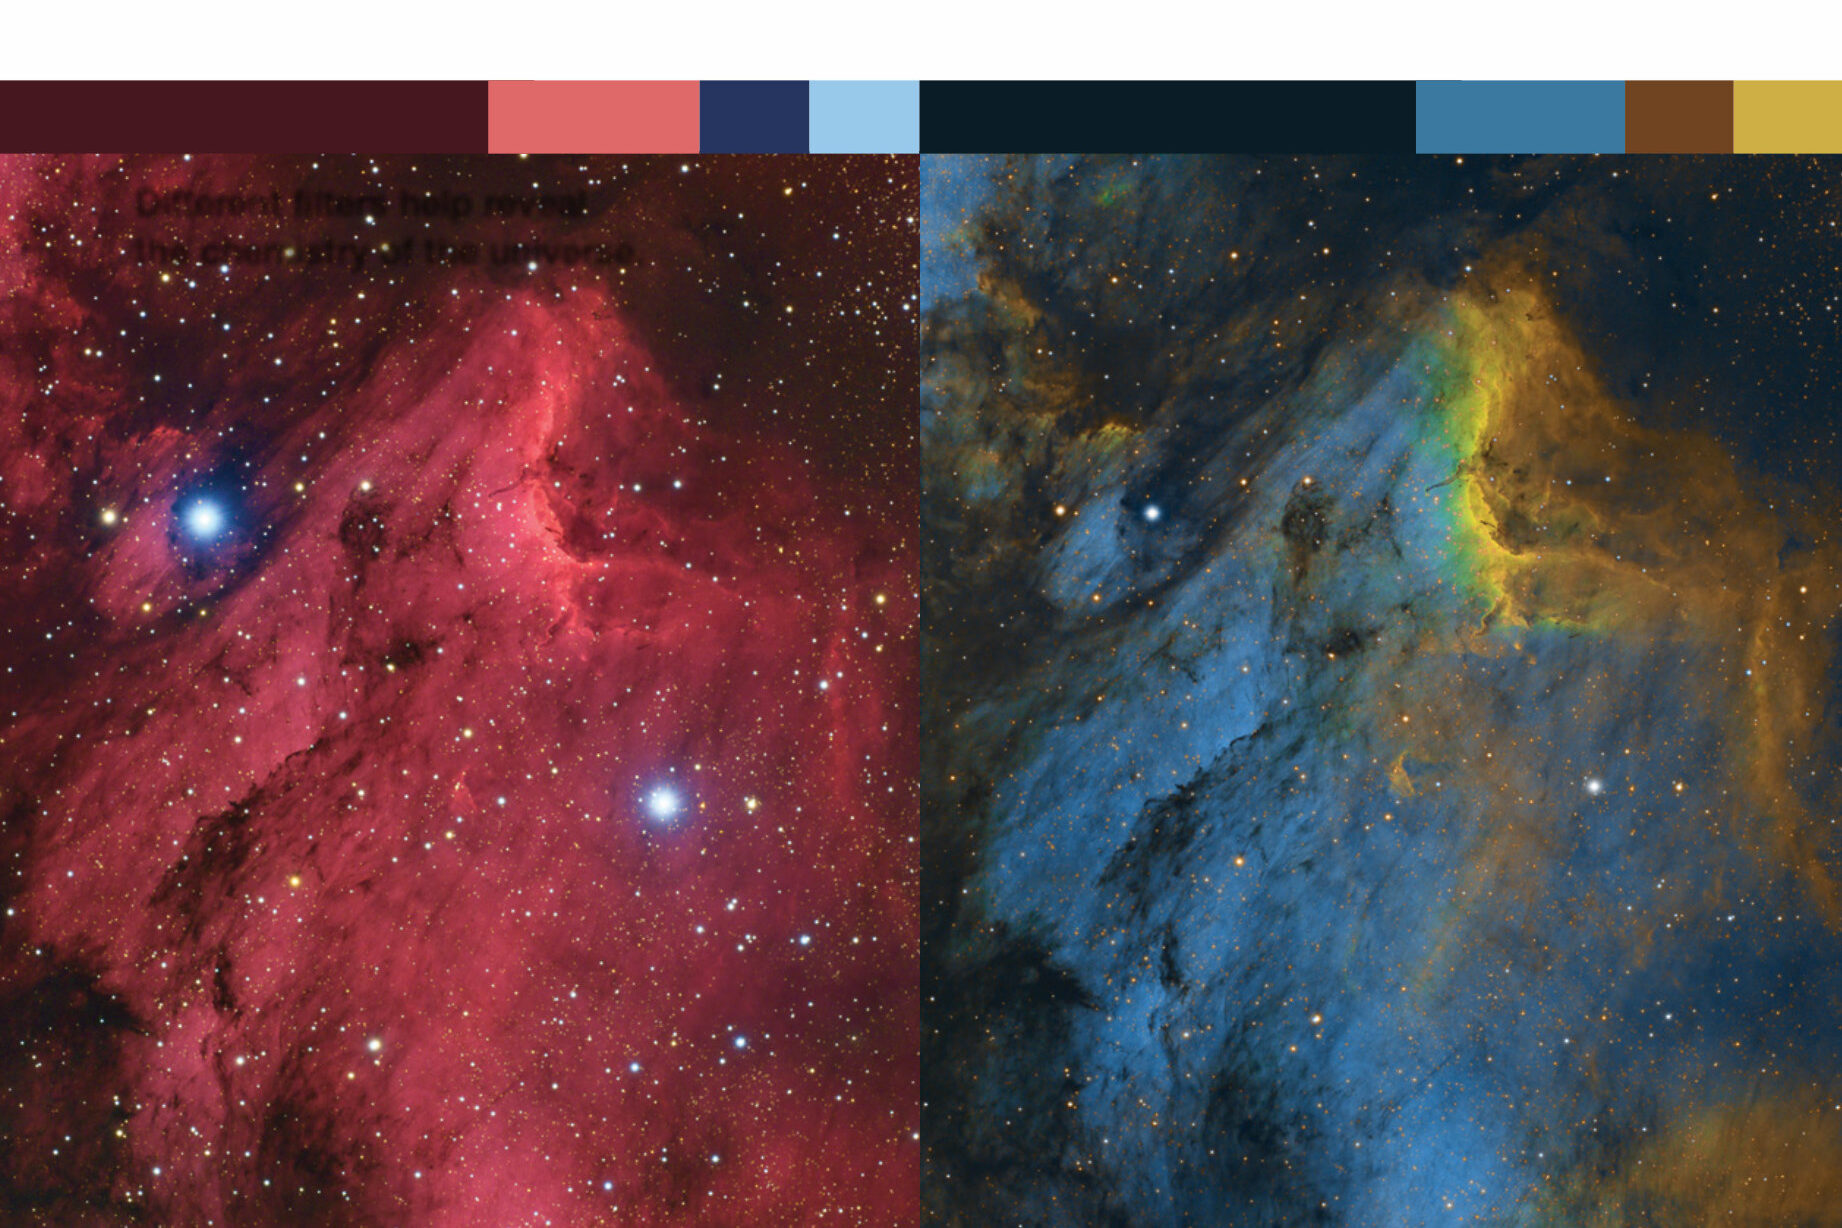
In recent years, complementary metal-oxide semiconductor (CMOS) detectors, which have similar and slightly newer technology, have supplanted CCDs as the detector of choice. CMOS cameras are both cheaper to manufacture and continue to improve with virtually every new model released (see S&T: Mar. 2023, p. 58). Today, they have the potential to change the way amateurs approach deep-sky imaging by eliminating much of the complexity from the pursuit. The future has arrived. Here’s how you can take advantage it.
Low-Noise Stacking
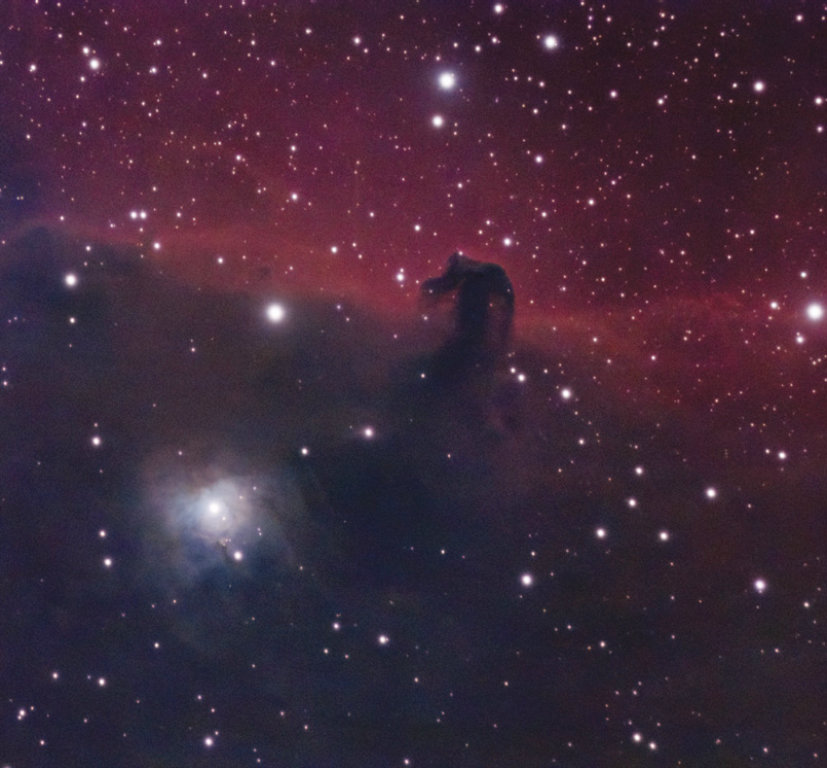
The big breakthroughs that allowed CMOS sensors to become the dominant technology for astro imaging are their infinitesimally low noise levels and their very high quantum efficiency. Indeed, some of the newest cameras are so good that it’s becoming increasingly common to capture colorful images of galaxies, nebulae, star clusters, and comets with lots and lots of extremely short exposures, rather than several longer ones.
One way to take advantage of this capability is to pair these detectors with software that continuously aligns and stacks short exposures, building up the photograph while you simply sit back and watch. This type of imaging is known as live stacking. It opens up a lot of possibilities for deep-sky photographers at any level of expertise and makes capturing impressive images much easier. Live stacking is long-exposure astrophotography approached a different way.
Several current programs include live-stacking capabilities: AstroToaster (astrotoaster.com), Jocular (https://is.gd/jocular), Sharp-Cap (sharpcap.co.uk), and TheSkyX (bisque.com) as well as some programs tailored for specific cameras. (The ASIAirPlus reviewed in the May 2022 issue includes ASI Studios with a live-stacking feature.)
Originally intended for electronically assisted astronomy (EAA), in which the image slowly builds up on the computer or tablet screen as you keep exposing, live stacking allows you to share the image with the public right at the telescope. This type of “observational imaging” has been around for quite some time. Manufacturers like Mallincam have long included it with their own cameras.
Johnny Horne
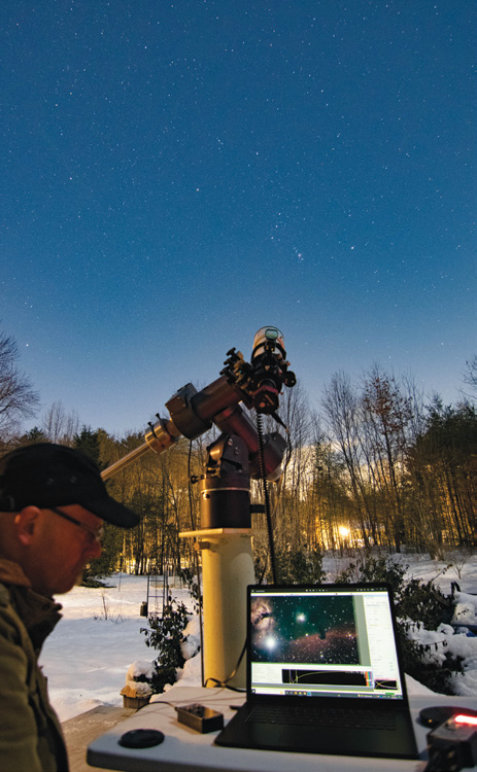
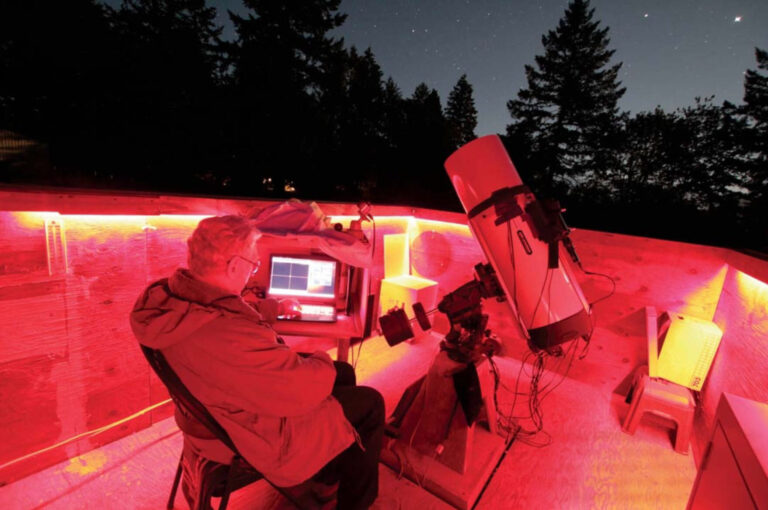
Live stacking isn’t limited to outreach. It can simplify your astrophotography rig by eliminating the need for autoguiding — the tracking corrections typically required when taking exposures of several minutes or more. That means you can put away the guidescope, extra tube rings, and autoguiding camera as well as all the cables and additional power needs. At the most basic level, you only need four things to live-stack: your telescope, a tracking mount, a low-noise camera, and a computer or tablet to run the software.
Your choice of camera is important for live stacking. As noted, those with the latest low-noise CMOS sensors will yield the best results. Rather than seeking a specific detector, look for models that have low readout noise levels as well as high quantum efficiency.
You can live-stack with planetary cameras as well as cameras with active cooling designed specifically for deep-sky astrophotography. I’ve had great results with planetary cameras by ZWO, Player One Astronomy, and QHY while imaging during cool-weather months in the fall and winter. But bear in mind that uncooled cameras such as these will produce more thermal noise in warm conditions, so a cooled camera will give you better results year-round.
Another important factor to consider is the size of the camera’s field of view. Models featuring small detectors may make it difficult to place your target within the frame. In addition, a good Go To mount will take the difficulty out of finding objects and help you image multiple targets in a single evening.
Sean Walker
Tracking and Exposure
As with other forms of imaging, your telescope mount’s ability to track the sky remains the most important factor to make live stacking work. As long as your scope can track an object across the sky, you can live-stack. How long you can expose is determined by how accurately your telescope can track before stars become elongated. But unlike imaging with long exposures, it isn’t necessary to use a polar-aligned equatorial mount. In fact, “observation stations” like the eVscope by Unistellar (reviewed in S&T: Dec. 2020, p. 66) and the Stellina by Vanois (S&T: Mar. 2020, p. 68) actually use live stacking to produce their images.
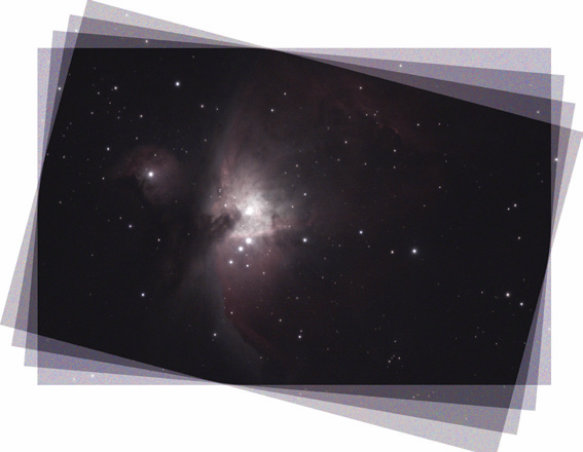
Let’s look at imaging with alt-az tracking first. In this configuration, the object remains centered in the field. However, since the telescope is moving in two axes as it tracks the sky, every image being stacked on the screen is slightly rotated compared to the previous one — an effect known as field rotation. You can avoid field rotation by limiting your subexposures to 30 seconds, and much shorter closer to the zenith. A good way to visualize how the frames stack in alt azimuth is by taking a stack of playing cards and turning each individual card by 5 degrees — the middle of each card remains centered on each card, but the corners do not. So, with this type of live stacking, the corners of the frame do not overlap. This means you increasingly have to crop into the center of the field as the exposures add up to remove the unattractive edges of the frame.
Johnny Horne
One additional drawback of imaging in alt-azimuth mode is that it’s difficult to track objects at the zenith because the mount reaches a point where it can’t smoothly follow a target because Earth’s rotation doesn’t correspond to the mount’s axes of motion. And that’s where an equatorial mount really helps.
Equatorial Improvement
Live stacking with an equatorial mount makes everything much easier. Sure, it’s more effort to set up and polar align, but your images will be far better. For one thing, everything within the camera’s field of view stays in the same place from one exposure to the next, permitting you to take advantage of your detector’s entire area.
Sean Walker
Tracking will still limit the length of your exposure, but that limit is based on two things: how good your polar alignment is, and how long you can expose before the mount’s periodic error (a recurring oscillation in the right ascension drive) elongates the stars. However, this may not be a significant problem, particularly if your camera and telescope combination produce an image scale larger than your mount’s periodic error (PE). Just limit your exposures so they are shorter than the point at which stars become elongated. The optimum exposure time may take a few minutes of trial and error to discover, but figuring it out will ensure you get good results your first night out. Some live-stacking programs have tools that measure the full-width, half-maximum (FWHM) stellar profile of images and reject frames that exceed the parameters you set.
Still, periodic error may not even be a concern if your goal isn’t high-resolution astrophotography. Wide-field, low-power telescopes will be much less sensitive to PE than long-focal-length instruments combined with the small pixels commonly found in CMOS sensors.
Sean Walker
At the Telescope
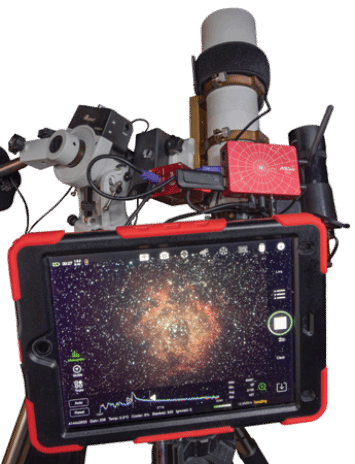
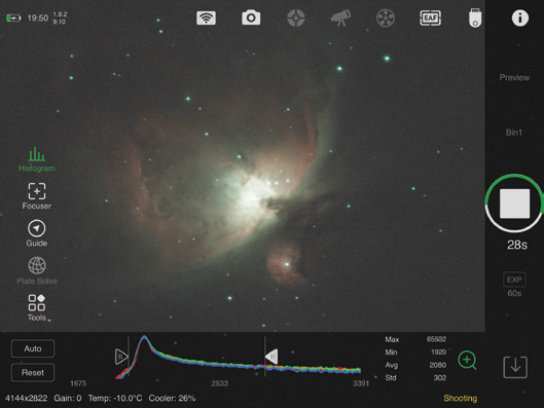
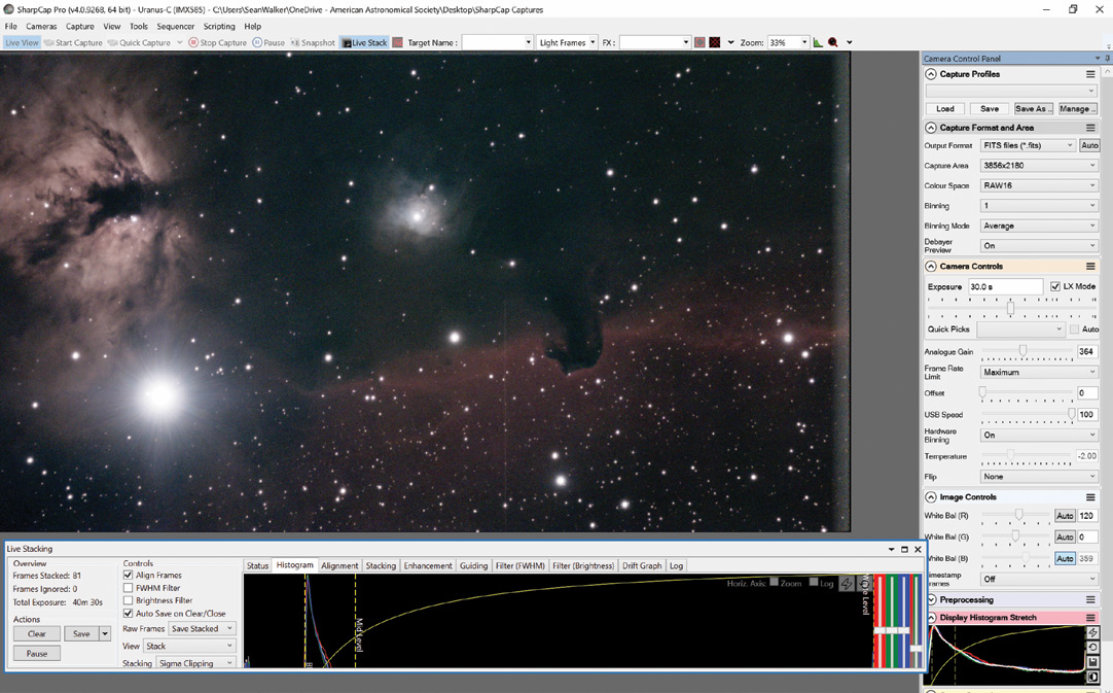
Once you get going, live stacking is quite easy. I use SharpCap for live stacking, but most programs that offer the feature have similar controls. My nights begin by aligning my mount, syncing the Go To on a known object. Next, I start SharpCap and connect my camera with the Camera pulldown menu. I then set an exposure of perhaps 2 seconds in the Camera Controls and open the program’s focus assistant tool (Tools > Focus Assistant > Multi-Star FWHM Measurement). This window measures the stellar profile of many stars in the field and produces an average value after each exposure. I adjust focus until I get the lowest average FWHM value. When I’m satisfied with focus, I then set the program to record several dark frames and flat-field calibration frames. SharpCap can apply these to the images as they are live-stacked if you input them in the Preprocessing section of the Camera Control Panel at the right side of the screen. The program does not save individual live-stacked frames with calibration applied, but I can also apply them later when processing the individual subframes in my preferred deep-sky image-processing program, if I so choose.
After the preliminary steps are out of the way, I slew to my first target and set the camera to take 5-second exposures. That’s often enough to begin to show a galaxy, star cluster, or nebula in the field. Next, I tweak the framing and set the exposure time a bit longer, perhaps 10 or 15 seconds, and open the live-stack function in SharpCap (Tools > Live Stack) to begin the imaging process. Slowly, the object begins to appear. At first, it’s fairly noisy. SharpCap includes some tools on the bottom of the window so that you can manually adjust the image to make it appear more attractive, which is particularly useful if you’re also sharing the view with onlookers. Controls include setting the Black Level, the Mid Level, and White Level, as well as three vertical sliders at the right for adjusting the color balance and luminance levels.
Sean Walker
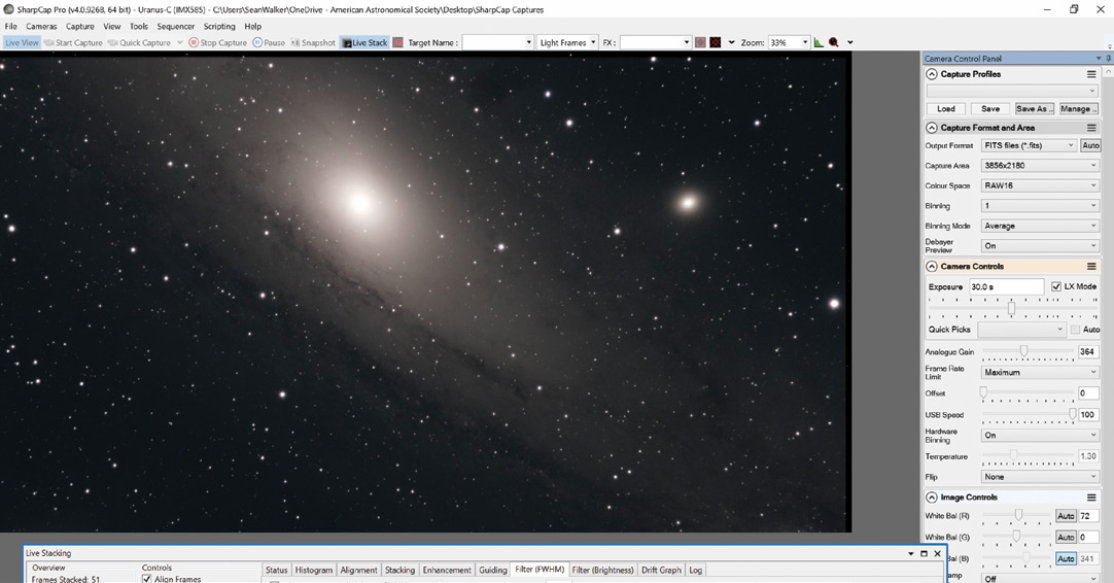

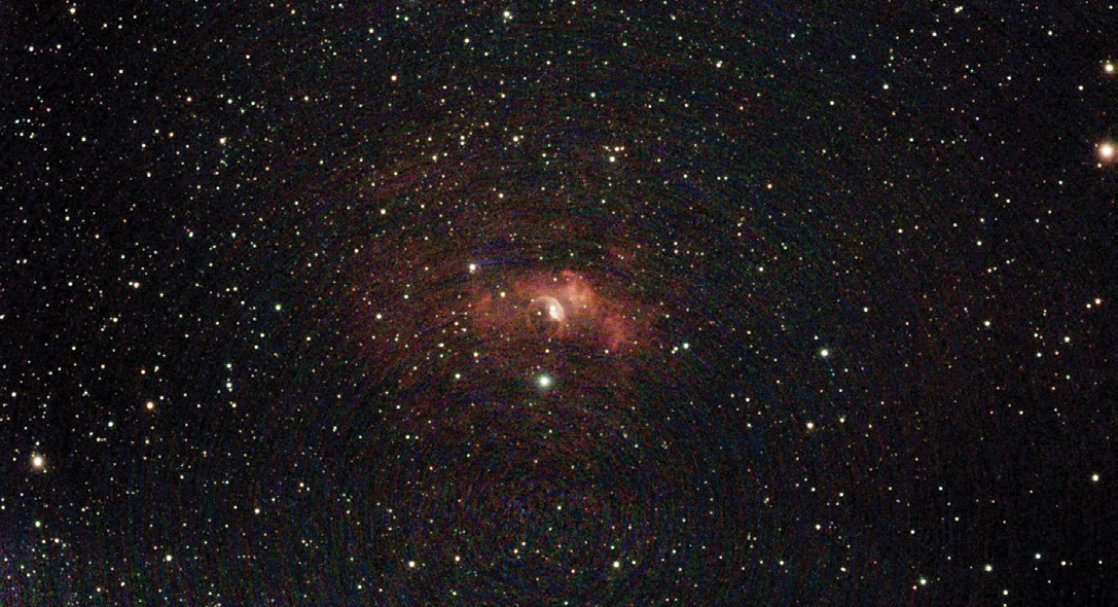
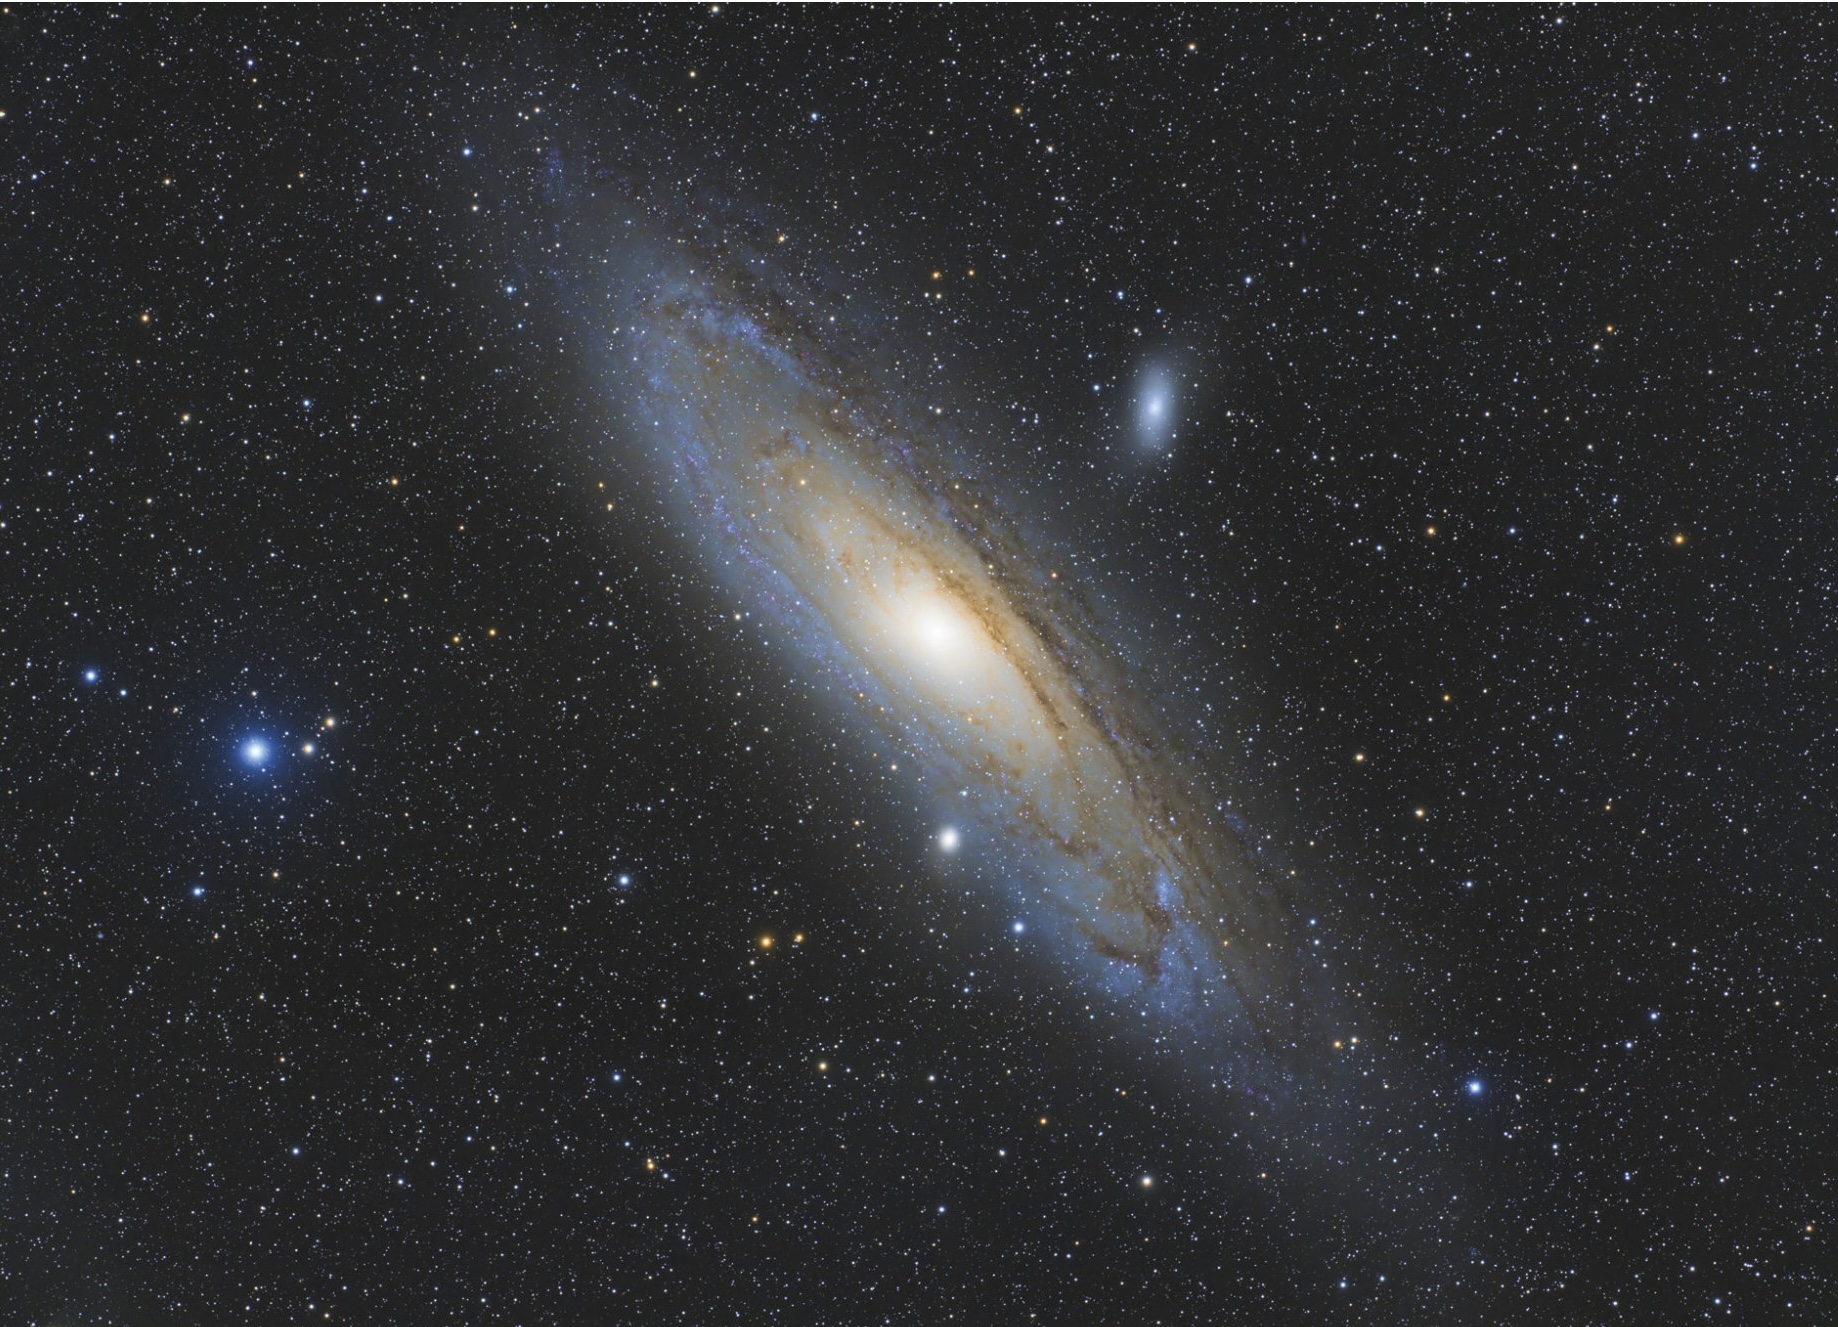
Once this is running, I can sit back and watch the image slowly get better. Setting up and getting everything working together doesn’t take much time at all, which is why livestacking is becoming a popular tool for outreach — seeing a nice picture of, say, the Triangulum spiral M33 building up on the screen in full color is extremely impressive, no matter if you’re an experienced observer or someone attending a public event for the very first time.
You can set SharpCap to save the individual frames recorded as well as the stacked version. There are several options for saving the stacked image when you click the arrow to the right of the Save button. These include Save as 16 Bit Stack, Save as 32 Bit Stack, Save with Adjustments, and Save exactly as seen. If you’re happy with what’s displayed on the screen, select the last option.
Depending on how good I’d like to make the final image, I can simply select Save exactly as seen and I’m done. But I find image processing to be half the fun, so I make sure to choose Save All in the Raw Frames pulldown menu and save the stacked image as a 32-bit unprocessed file.
This stacked image is already pretty good, though it may contain light-pollution gradients that may take some expert- level image-processing work to fix. If that’s the case, then I’ll re-stack the image using the flat-field calibration frames I recorded and correct these problems.
Re-stacking for Aesthetics
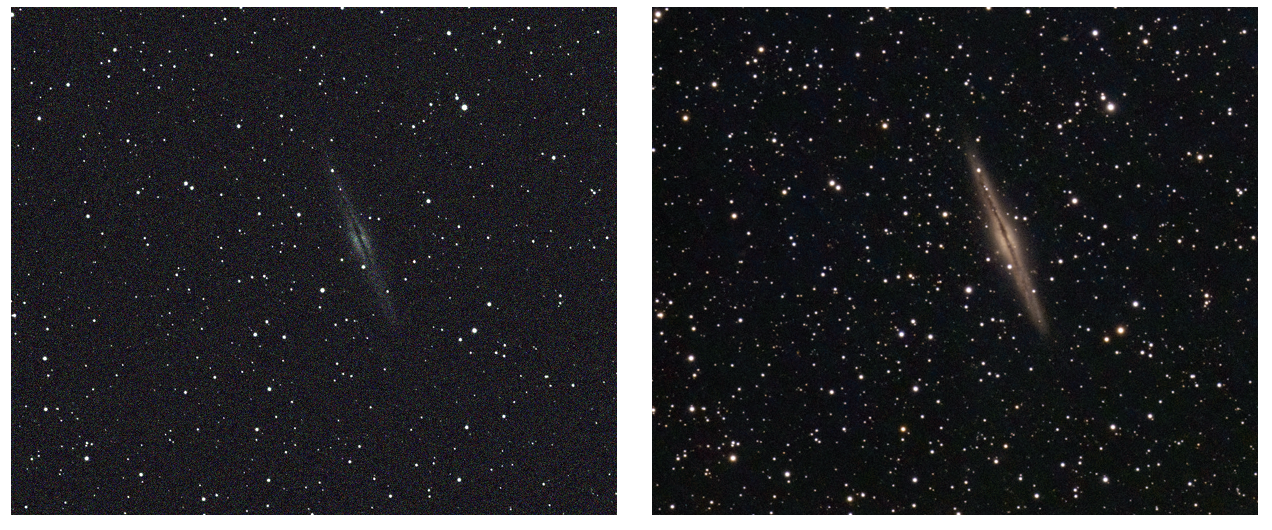
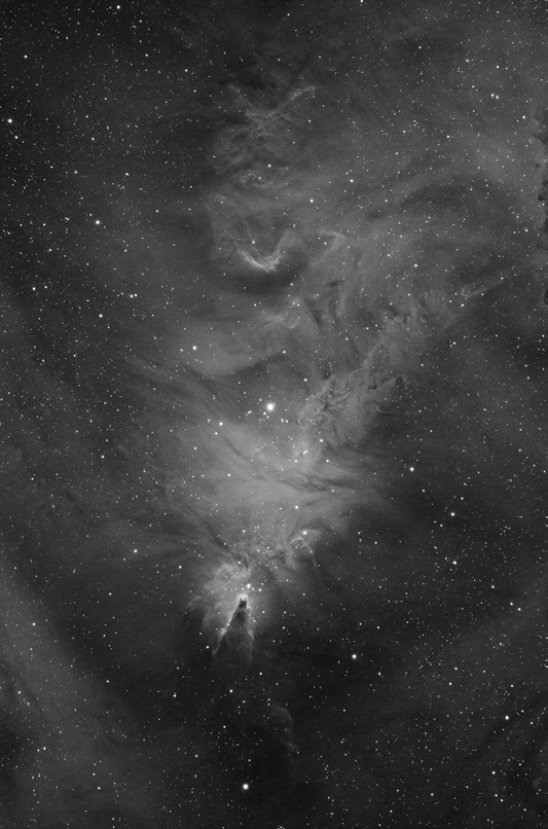
Live stacking makes for a great public outreach tool, which allows you to share the view as your selected target emerges more clearly with each added exposure. But the method also produces great data that you can then stack later on to make impressive pictures. You can treat these images just like you would with any other type of deep-sky imaging that you’ve read about in these pages over the years. The difference, though, is you’ll likely be stacking hundreds of exposures to make your final image. This might require a fairly robust computer with a good amount of RAM.
Richard S. Wright, Jr.
Stacking is the most time-consuming aspect when combining hundreds of short exposures, especially if you shot with a color camera. Each frame will need to be converted into a color image first. That’s because the detector is actually a grayscale device fitted with a red, green, and blue Bayer filter matrix in front of it. After that, the frames still need to be aligned and combined.
I’ve had good luck performing all these operations in both DeepSkyStacker (deepskystacker.fr) and PixInsight (pixinsight.com). Other programs may struggle when aligning large numbers of files, but each worked well processing the live-stacked 32-bit FIT file produced by SharpCap.
Once you’ve stacked the images, it’s simply a matter of stretching the result to display the full range of brightness, adjusting the color balance, and then applying some mild sharpening and noise reduction, if desired.
Live stacking is perhaps the easiest way to get into deep-sky imaging today. By taking advantage of the high-sensitivity and low-noise characteristics of the latest CMOS cameras, you can set aside much of the complexity of deep-sky astrophotography and concentrate on enjoying your time under the stars. You can even entertain family and friends by showing the image as it slowly comes together on your device’s screen.
This article originally appeared in the May 2023 issue of Sky & Telescope.
About Sean Walker
S&T Senior Editor Sean Walker joined the staff of Sky Publishing in 2000 and specializes in astrophotography, solar system observing, and astronomy gear.


Comments
You must be logged in to post a comment.