 3
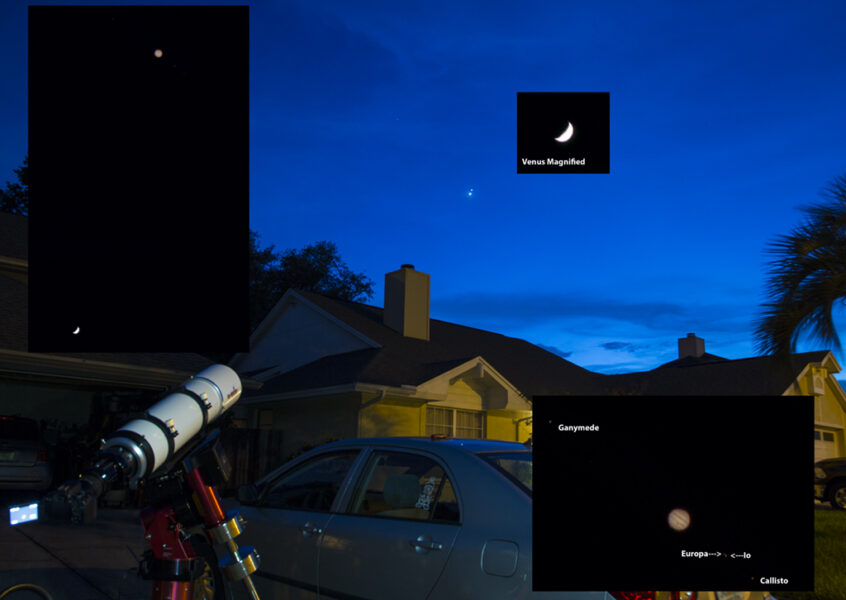
3Just in case you missed the memo, it's planet season! The planet parade starts as soon as the sky begins to darken, with Venus setting to the west and the wide pair of Saturn followed by Jupiter climbing in the southeast.
This is the perfect time to capture the gas giants, since you don’t have to stay up late nor set your alarm for early morning. While they're so well placed, let’s start with some basic imaging foundations (see what I did there?).
Richard S. Wright Jr.
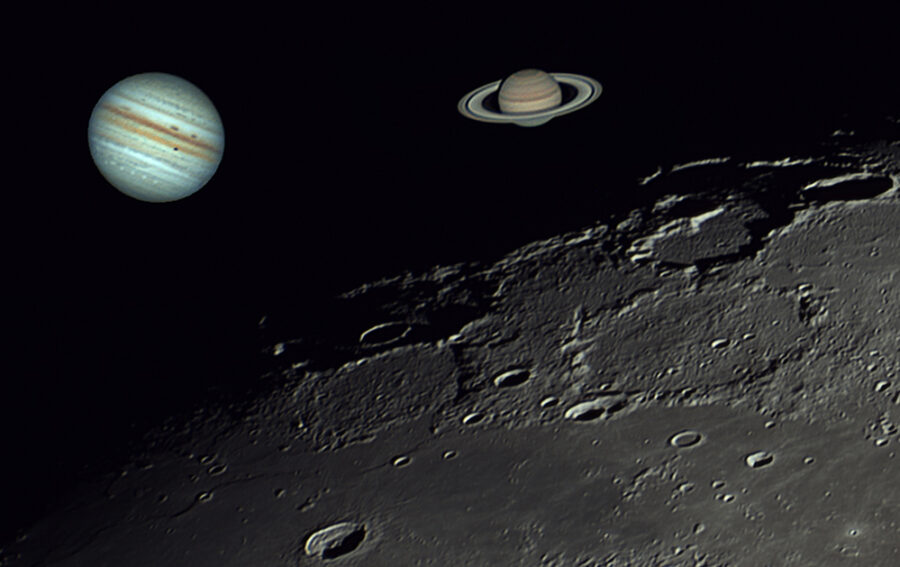
While many deep-sky targets are quite large as seen from Earth, with some exceeding the apparent size of the Moon, the planets are, in comparison, much smaller on the sky. So while astrophotographers don't require high magnification to photograph most deep-sky objects, magnification is essential for resolving details in the major planets.
Fortunately, the planets are also staggeringly bright compared to deep-sky objects, so you don't need to have a photographically fast telescope to record them. In fact, they require very short exposures, much like daylight photography. Focal ratios of f/12 or f/20 work well for imaging solar system objects.
Modest Focal Lengths Can Play, Too!
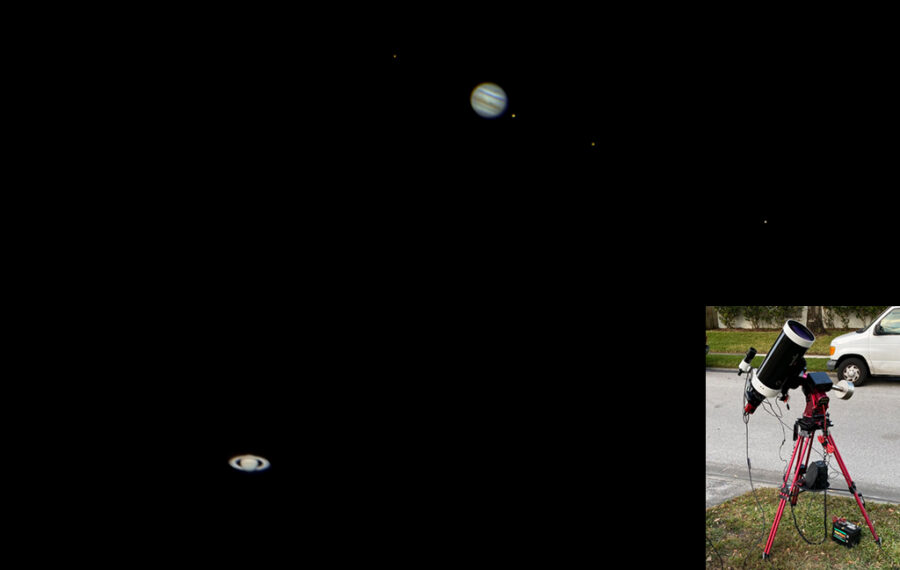
High magnification by definition requires a long focal length — but don't be discouraged if you don’t have a telescope with a long focal length. You can increase most any telescope's focal length by adding a Barlow lens or other amplification optics (even an eyepiece). You'll then be able to see Jupiter as a small disk, its major belts distinct, and the four Galilean moons alongside. The same goes for Saturn — its unique shape is unmistakable in even the most modest telescope-camera combinations.
While the giant planets might not look that impressive at the prime focus on your 1,000 mm with a DSLR camera, they become much more interesting if you take two exposures and combine them into a single composite. Shoot one image that records the banding on Jupiter or Saturn, then a longer shot that overexposes the planet a bit to capture its moons, then combine the two afterward to show everything together. I find this the only way to show the Saturn and its attendant moons.
With some bracketing (that is, by recording progressively longer exposures), I can often record the Galilean moons in the same exposure as the king of planets itself.
When recording the planets at this fairly small image scale, there's no need to fuss with fancy lucky-imaging techniques — a single exposure with a color camera can still make a remarkable image.
Richard S. Wright Jr.
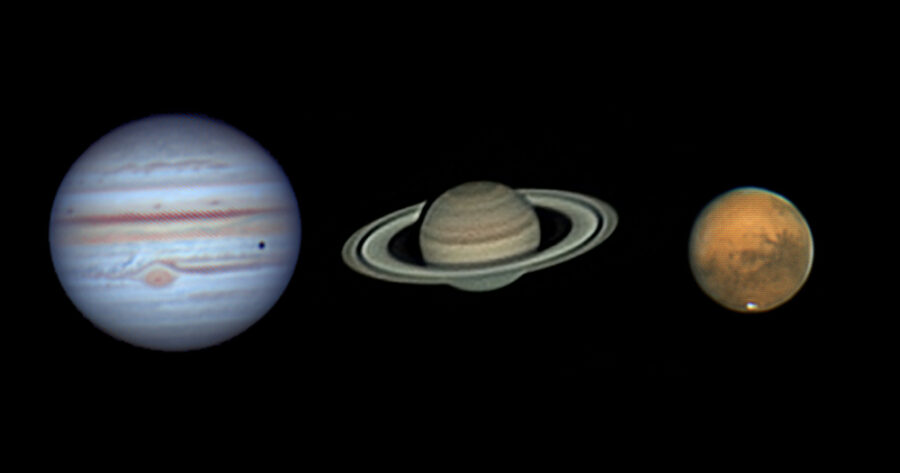
However, if you're after high-resolution images of the planets, you're going to need a long focal length and a fast planetary video camera. Image scale depends not just on focal length but also on pixel size. A focal length of about 3,000 mm or so is where you'll start to magnify the gas giants enough to see lots of cloud details using most planetary cameras on the market today. That's the point at which I call the resulting images “high resolution.”
Aperture + Steady Seeing = More Details
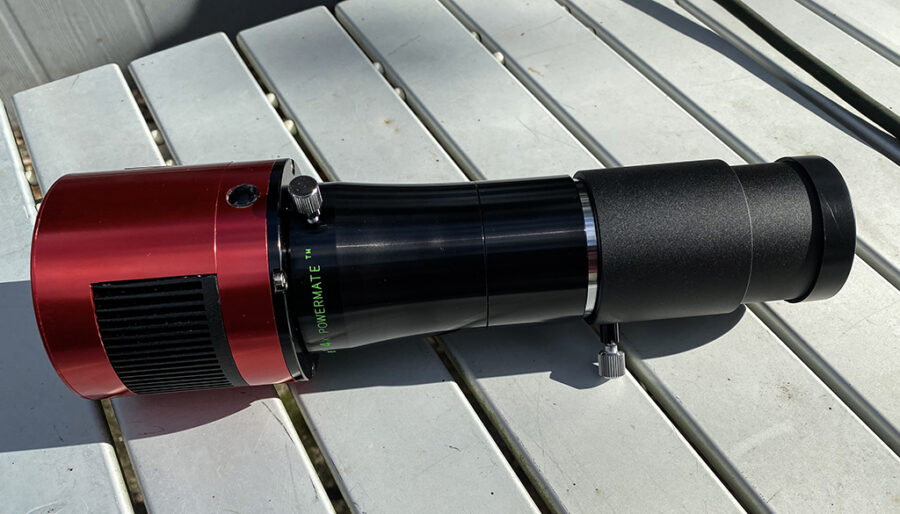
It’s hard to put a definitive number to the minimum aperture for getting started with high-resolution work. I’ve gotten good results using a 6-inch refractor with a 4× Tele Vue Powermate, producing a focal length of 4,200 mm.
That combo was better even than the softer images produced with a 7-inch Mak-Cassegrain and a 2× Powermate operating at 5,400 mm, but the difference was in the seeing conditions. The seeing was stable enough to support a sharp image in a 6-inch telescope at 4,200 mm, while the 7-inch at 5,400 mm was simply too much for the size of the seeing cells.
Even in excellent seeing, you can only magnify an image so much for a given aperture. I've done my best work with a 12-inch Newtonian and a 4× Powermate at an effective focal length of 4,800 mm. How far you can go with your setup depends a great deal on your local seeing , so you'll have to experiment over some nights to determine what your limits are.
Richard S. Wright Jr.
Getting Lucky
Lucky imaging is a technique in which photographers pick out the best frame(s) of the video, capturing the moments when the turbulence in the atmosphere is momentarily at a minimum. (See my earlier blog on lucky imaging for more information.) But while it can help you beat the seeing, it can’t beat the physics of optics. You need aperture to not only reach the optical resolution you need but also to collect enough light, so that you produce a bright-enough image to record. The more you magnify a planet (or anything else, for that matter), the more you spread out the light, creating a dimmer image. To obtain a clean image, you still need good signal.
For planet photography, lucky imaging can be boiled down to a balance between exposure time and photons. You want to achieve a short-enough exposure so that you can record many frames per second, in order to beat the seeing. But you still want to produce an image bright enough to process later. Most planetary acquisition software lets you tweak the camera's gain and exposure settings to help with this challenge.
Richard S. Wright Jr.
Still, lucky imaging can only do so much to beat the seeing conditions. There are times when the weather simply won't allow for high-resolution imaging. And even when conditions are good and your optics well-collimated, there are still things you can do to make things easier for yourself.
- Make sure your telescope isn't warmer than the outside air — give it time to cool down to match the ambient temperature (hot telescopes deliver terrible images).
- Avoid imaging a planet that's directly over a house or building, if possible. Heat built up during the day will radiate up and create "chimneys" of very bad seeing. The best results are typically shot when the planets are as high as possible and you are shooting over trees or water, not buildings or hot pavement.
- It can be frustrating trying to land the (apparently) tiny planets on your sensor at extremely high magnifications. Start with a low-magnification eyepiece, and then once you've centered your target, swap in your camera and Barlow or Powermate.
- A camera with a fairly large sensor can be useful when hunting for a planet you know is just outside of your field of view (FOV). Set your camera to its entire FOV, and chances are you'll find it near the edge of the chip. Carefully center it, then select a smaller ROI (region of interest) just around the planet to avoid recording lots of empty space in your video.
Seeing isn't the only thing that will blur your planetary images. Video shows how environmental vibrations affect your mount and telescope. A stable image of a planet will suddenly start rapidly lurching back and forth if someone is walking around near your telescope. In my backyard, you can watch the video suddenly jump when a nearby central air conditioning unit kicks on, creating a steady undulation in the video until the unit turns off again. I also see huge jumps when a large truck drives past my house.
Richard S. Wright Jr.
But unlike deep-sky imaging, you don’t need to wait for new Moon or pristine skies to shoot the planets. They are all bright enough to be immune to light pollution! So, what are you waiting for?
About Richard S. Wright Jr.
Contributing Editor Richard S. Wright Jr. is a software developer by profession specializing in computer graphics technologies at LunarG Inc. Richard is also a consulting engineer and imaging specialist for Software Bisque. A lifelong amateur astronomer, Richard first experimented with a webcam and black-and-white film images of the Moon in the 1990s, and he subsequently became hopelessly addicted to astrophotography. Currently, he seeks treatment at his dark sky camp/observatory in Okeechobee, Florida, whenever he can. Check out his online photo gallery.

Comments
Patrick Thibault
September 16, 2021 at 9:03 pm
Sorry Richard, your article is a little to general for me. Perhaps, you could try walking a person through a few steps and how-to use the tools of the trade. DSLR may be known to camera buffs or those already engaged in astrophotography but a clearer description is needed, like how to connect to a scope or use without scope.
I'm not any closer to going out and taking images but rather have a vague idea of how to proceed. Thanks
You must be logged in to post a comment.
Richard S. Wright Jr.Post Author
September 16, 2021 at 11:27 pm
Well Patrick thanks for reading anyway. My goal was to be a pretty broad introduction to someone not acquainted at all, and in the future I'll certainly come back to this topic in the bite size pieces the blog format requires and cover some of the topics you were looking for.
You must be logged in to post a comment.
Richard S. Wright Jr.Post Author
September 22, 2021 at 10:42 am
I'm going to add that the things I've talked about here are really often the most missed things by people getting started in planetary imaging. Learning first how to connect a camera to a scope is the worst way to get started. You really need to first understand how focal length and local conditions are going to limit what you can do when you start out. Future blogs on this topic will probably point to this one as something to read first.
You must be logged in to post a comment.
You must be logged in to post a comment.