 0
0Star trail images are a great and fun introduction to nightscape photography, and they're actually pretty easy to do.
Astrophotographers spend a lot of time figuring out how to accurately and smoothly track our targets in the sky for long exposures. Normally, trailing stars are a problem and diagnosing them is the bane of amateur and professional astronomers alike. However, for wide-field nightscapes, star trails can be very beautiful, and they illustrate well Earth's rotation. I’ll leave it as an exercise for the reader, but with some basic geometry, you can even use star trails to demonstrate that Earth is round, just like the ancient Greeks did. (You do have to travel though!)
Richard S. Wright, Jr.
What’s more, the equipment needed to create star trails is rudimentary. All you need is a tripod (no tracking required — or wanted), a camera, and an inexpensive shutter release cable. A wide-angle lens works best, but even a standard kit lens will capture a large swath of sky. What’s more, the lens does not have to be particularly fast; some aberrations out at the edges of the frame will have little effect on your final image.
Richard S. Wright, Jr.
A star-trail image does require hours of exposure time, but it’s not practical to make a single exposure that lasts that long. Instead, take many exposures and combine them later into one composite. The easiest and least expensive way to do this is with a shutter release cable that locks down the shutter. Set your camera for an appropriate ISO and lens aperture for a 30-second shot on manual mode, with the shutter set to burst or continuous fire (It looks like three overlapping boxes). When you lock the shutter down, the camera will just continually fire one 30-second exposure after another until you stop it.
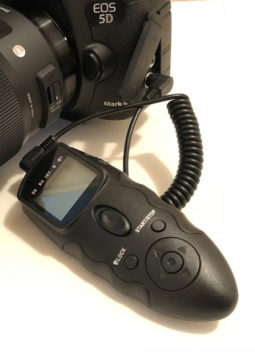
If you want a little more flexibility and control without having to resort to tethering to a computer on site, you can purchase an intervalometer. This is an external device that plugs into your camera and allows you to program it to take a series of exposures while the camera is set to bulb mode. You can go longer than 30 seconds if desired (for example, to properly expose the foreground) and if you wanted to be creative, you could even stagger the images somewhat, with a delay between exposures.
There are some newer camera models on the market that actually have internal intervalometer features built right into the camera. There are also add-ons, such as Magic Lantern for Canon DSLRs, that allow you to add this kind of feature to an existing camera. Another interesting new add-on product is the Arsenal, which works with dozens of different camera models, or a similar product called the Pluto Trigger. Point is, there are plenty of options if you want to get creative.
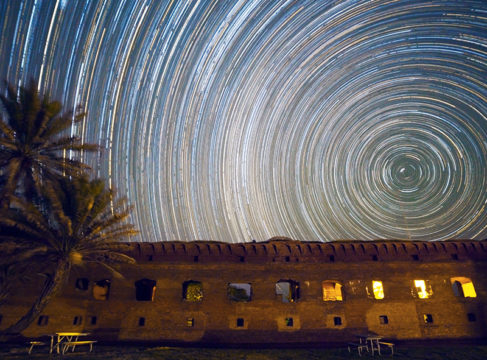
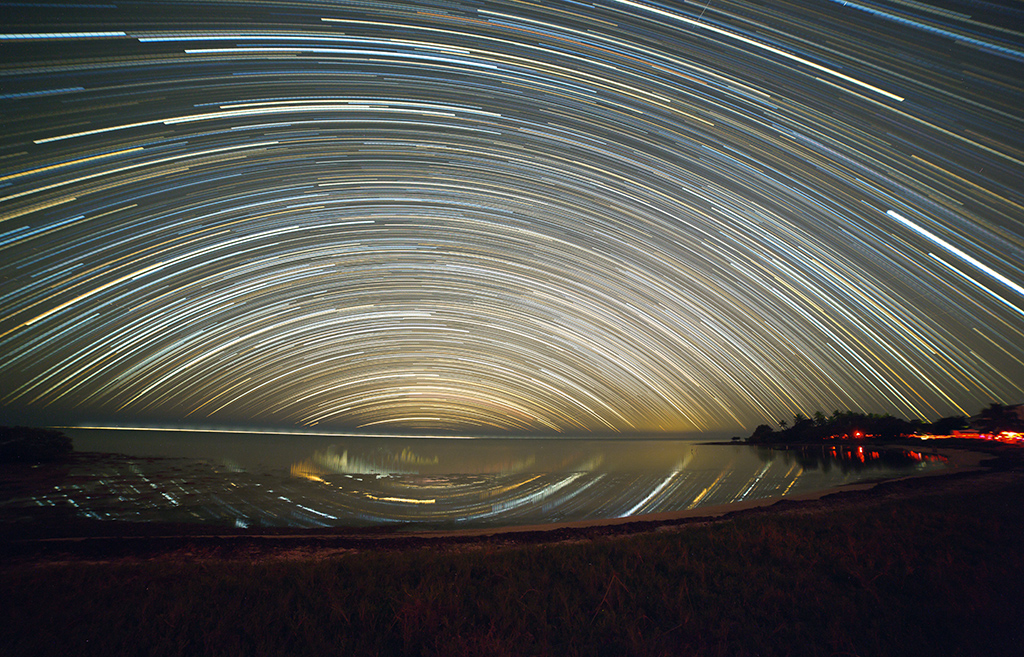
Star trails by themselves are an interesting technical demonstration, but for a good photograph you need good composition. Find some interesting foreground objects, be it buildings, landscapes, or something else manmade that's interesting to feature in front of the trails.
Richard S. Wright, Jr.
My previous recommendations for best ISO don’t necessarily apply to nightscapes. You’re going to take a long exposure and collect a lot of light, which will likely swamp out any read noise or fixed pattern noise. So you can turn the ISO all the way down if you need to. When adjusting your ISO and aperture, check the histogram. The maximum level should be more or less centered or slightly to the left. If you move too much to the right, you will saturate the brighter stars and lose some of the star colors in the trails. Exposing to the right also will add a lot of sky fog and light-pollution to your images as well, which we want to avoid in most astro images anyway.
The other factor to monitor is the foreground. If your foreground objects are overexposed, then you may need to back off on individual exposure times, or take a separate short exposure to blend into your final composition later.
Richard S. Wright, Jr.
You can shoot RAW or JPEG, but I still recommend always shooting raw. There’s not a terrible amount of finesse needed for star trails in terms of shadows and highlights, but you should always give yourself room for adjusting the foreground even if you don’t think you’ll need to process for the stars themselves. There’s no going back after an image is overexposed, so it’s better to be safe than sorry!
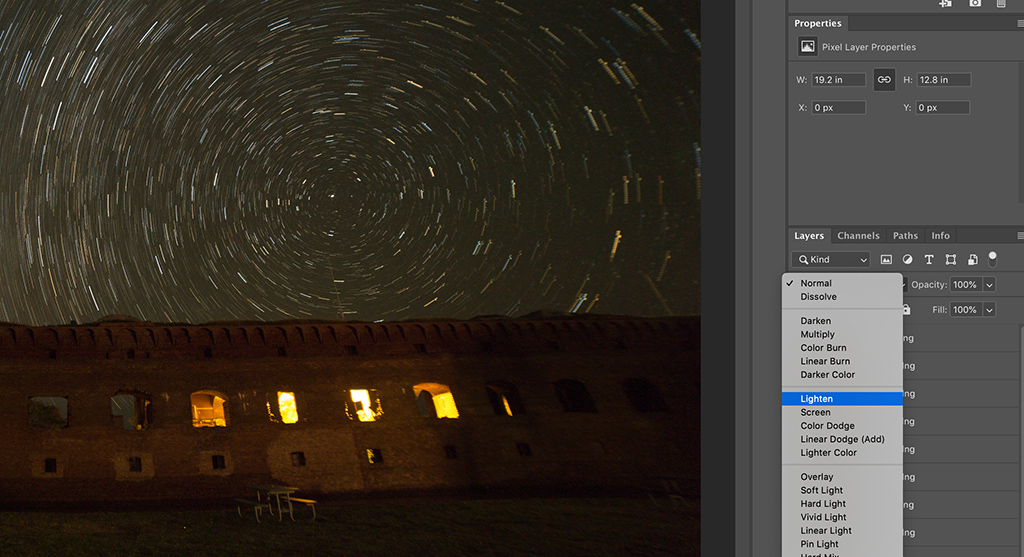
Once you have a collection of trailed images, you need to combine them all to make your final presentation. Unlike deep-sky astrophotography, we can simply combine all the images without aligning them first. Almost any photo-editing software will allow you to load a series of images into layers and blend them together. A free and easy to use tool Windows users should check out is a program called Startrails. I do most of my work on a Mac, and so my tool of choice for this is Adobe Photoshop, since I use it daily anyway. Under File/Scripts you'll find "Load Files Into Stack", which will load a selection of images as separate layers. Simply setting each layer to “lighten” will bring forward all the smaller individual star trails and combine them into one. Make sure there is as little time gap between each photo as possible, lest your trails look more like dashed lines!
Happy Trails!
About Richard S. Wright Jr.
Contributing Editor Richard S. Wright Jr. is a software developer by profession specializing in computer graphics technologies at LunarG Inc. Richard is also a consulting engineer and imaging specialist for Software Bisque. A lifelong amateur astronomer, Richard first experimented with a webcam and black-and-white film images of the Moon in the 1990s, and he subsequently became hopelessly addicted to astrophotography. Currently, he seeks treatment at his dark sky camp/observatory in Okeechobee, Florida, whenever he can. Check out his online photo gallery.


Comments
You must be logged in to post a comment.