 5
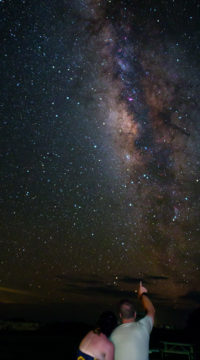
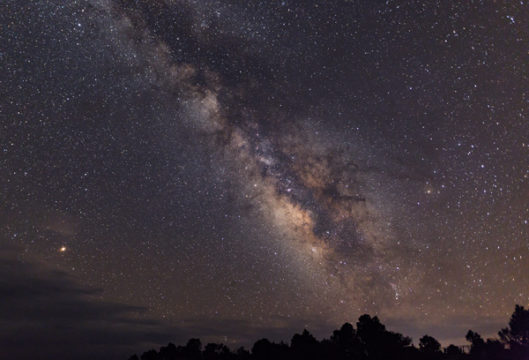
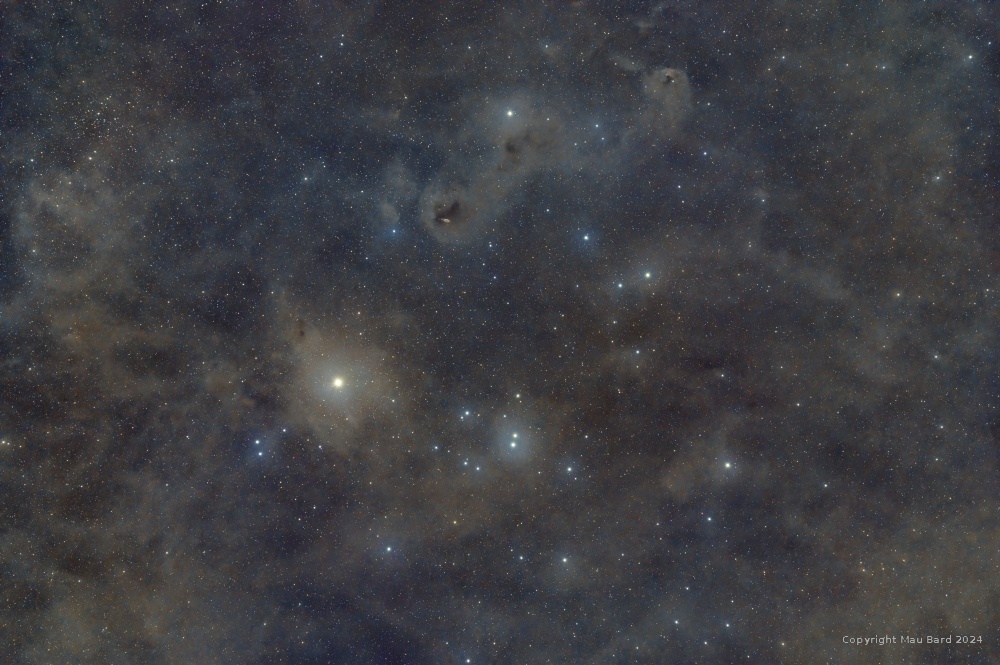
5It’s summer time, and the Milky Way is beckoning. Here are a few tips to help get you started photographing our galaxy.
Richard S. Wright Jr.
When it comes to astrophotography, I find nightscapes to be the most enjoyable way to practice the hobby. It brings me back to the simplicity of using a hand-held camera to photograph birds, water falls, or my kids' sporting events. The main subject of nightscapes is most often the Milky Way. Here are a few pointers to help you enjoy shooting the night sky, too.
Focus
The first order of business is getting in focus. Your camera's autofocus will not work on the Milky Way; you will have to focus manually. The basic trick I use is to first place your lens near the infinity mark to get somewhat close. Then crank up the ISO really high and set the exposure time to something like 10 seconds. Now put your DSLR in live-view mode and point at a very bright star or planet. What the camera does is try and simulate the view live, typically by driving up the ISO even further. You may need to experiment some, as this will vary in different camera models, but at some point, you’ll see a small bright blob on the LCD. Zoom in on it and adjust focus until the blob is as small as possible. I often need to point the camera at a bright star or planet, then once focused, frame up the shot I want elsewhere.
Richard S. Wright Jr.
Sometimes it can be hard to tell if your focus star is really as small as it can be, and there’s a range of motion where the star appears to stay the same size. If you point at a rich star field (say, like the Milky Way or something!) and watch carefully while slowly moving the focus, you should see several other very faint stars suddenly appear and vanish as you pass through best focus. Adjust your lens to this location, then: “hands off.”
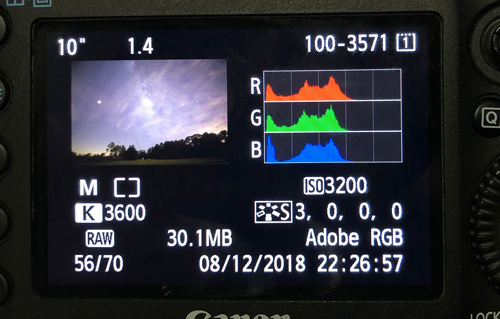
Don’t forget to turn the ISO back down! Shooting at ISO 256,000 is just going to compress your dynamic range and make it difficult to create a rich, compelling image. Don’t go too low either: As we mentioned last month, low ISO settings on most DSLR’s (especially Canon models) can actually produce noisier-looking images. A quick rule of thumb is that an ISO between about 1600 and 3200 hits the sweet spot in terms of tradeoffs. Next month, I’ll show you how to determine exactly where your camera's sweet spot is, but you can always take multiple exposures at different ISO’s and compare the results yourself.
Our biggest source of noise when shooting nightscapes is shot noise, and the way to defeat shot noise is with more light. This means a fast lens or more exposure time.
Richard S. Wright Jr.
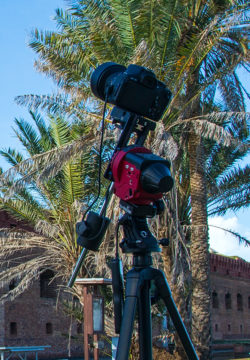
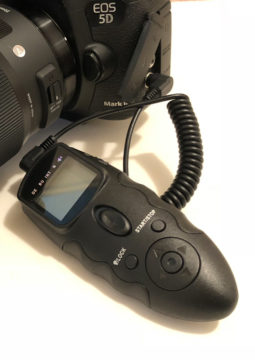
The easiest way of getting more light on your sensor is to simply take longer exposures. To prevent star trails and a smeared Milky Way, you can use one of several commercially available sky trackers. You'll also need a sturdy tripod, as well as a way to polar align the tracker. Fortunately, most trackers come with polar scopes, and an Android or iOS app will walk you through the alignment process.
Exposure Time
With a well-aligned sky tracker, we can expose for as long as we need for all practical purposes. The key question is, how long? Our best friend here is of course the histogram display on our camera. At a minimum, you want the histogram to be extended at least a little bit from the left-hand side of the screen more towards the middle. There's a photographic movement afoot called “expose to the right” that recommends pushing the exposure a bit higher and close to the right-hand side and then darkening the image in post-processing. This supposedly gives results superior to what you get when you stretch the image to make it brighter. I, however, find the risk of overexposing some stars and losing their color to be a trade off I’m not willing to make.
Richard S. Wright Jr.
Depending on your focal ratio, a DSLR on a tracker may need anywhere from just a few seconds of exposure time to a minute or more. Most DSLRs do not like taking more than 30-second exposures without an intervalometer (an electronic shutter-release device), so that’s also a required accessory. If your camera has a mirror lock feature, turn that on. This eliminates vibration before the shutter is opened and can help to produce sharper results. Of course, if you have one of the newer mirrorless cameras . . . all the better!
Avoiding Star Trails
Richard S. Wright Jr.
My favorite way to shoot nightscapes or the Milky Way in general is just with a camera on a fixed tripod. One issue with tracking the sky is that the landscape blurs. Rather than try and combine multiple exposures, I prefer the idea of just “taking a picture” in one go. To do this you need a short focal length and a fast focal ratio of ideally f/2.8 or better.
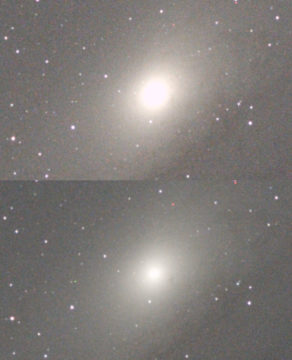
There is a popular rule of thumb called the rule of 500, which states that you divide 500 by the focal length of your lens, which tells you roughly how long you can expose before the stars start trailing. I personally don't agree with this advice. The main reason is that it neglects pixel size which, combined with focal length, is the real cause of trailing stars. Remember pixel scale? The real question is, how long does it take for a star to move from one pixel to the next? Also, stars along the celestial equator move faster than stars near the poles, which the 500 rule doesn’t taken into account either.
My formula is simply this . . . don’t be lazy. Use the rule of 500, if you like, for a first guess and take an exposure. Then zoom in on the back of the camera in the middle of the image and see if the stars are trailing or not. If they're not trailing, increase the exposure time; if they're trailing, decrease the exposure time. Piece of cake! Now you know the upper limit for exposures with your particular camera and lens for where you're pointing in the sky. A small amount of trailing is hard to see unless you are zoomed way in on an image, but even a little trailing spreads the light out and destroys the sharpness of the image. In fact, a slight amount of trailing for a long exposure also looks brighter (which is why you can't always trust the histogram), but that’s because all that additional light is being smeared across several pixels and so yes, you get more lit pixels, but you do not get the sharp clear image that you’re after.
If you have a slow lens and a camera that is not very sensitive to begin with, the sky tracker is your best option, or you can take multiple short images and stack them the way you would a deep-sky target through a telescope.
Richard S. Wright Jr.
Another nice perk to shooting on a tripod is there is no need for an intervalometer. No lens on a tripod is going to let you expose for 30 seconds without star trails (even a fisheye lens), and most cameras will take up to 30-second exposures without one. For best results, turn on mirror lock and set the exposure mode to a countdown timer. I set mine for 10 seconds. When I press the shutter, the mirror flips up as I back away from the camera and 10 seconds later (plenty of time for the vibrations to die down), the exposure is made for the preprogrammed exposure length. Just like shooting landscapes . . . with slightly longer exposures.
I hope this helps; the rest is up to you and Photoshop. Summer is almost over, so get going!
About Richard S. Wright Jr.
Contributing Editor Richard S. Wright Jr. is a software developer by profession specializing in computer graphics technologies at LunarG Inc. Richard is also a consulting engineer and imaging specialist for Software Bisque. A lifelong amateur astronomer, Richard first experimented with a webcam and black-and-white film images of the Moon in the 1990s, and he subsequently became hopelessly addicted to astrophotography. Currently, he seeks treatment at his dark sky camp/observatory in Okeechobee, Florida, whenever he can. Check out his online photo gallery.


Comments
John Schnupp
August 22, 2018 at 1:44 pm
I am very much enjoying this series of articles/blogs.
Concerning the 500 rule, it is for full frame sensors. Lens focal lengths are generally given based on standard full frame sensor. The smaller APS-C sensors require an even shorter time due to the sensor crop/zoom factor. I agree that the best way is to examine each shot and find the point at which trailing becomes unacceptable. Too many people seem to think that following a few overly simplistic formulas will net them great images. Milky Way, and other astrophotography, not a point and shoot affair.
While it is possible to shoot Milky Way, constellation and nightscapes without an intervalometer, using one makes it much easier to take multiple frames for stacking. On my EOS 60D, the mirror will only stay locked up for 30sec, if the second press does not happen within this time the mirror will drop. With the correct programming of the intervalometer and the correct mode on the camera it is possible to gather multiple exposures with minimal touching of the camera required.
You must be logged in to post a comment.
Richard-Lawler
December 18, 2020 at 1:30 am
APS-C sensors do not require shorter exposures than full-frame sensors assuming both sensors have the same size pixels.
You must be logged in to post a comment.
Richard S. Wright Jr.Post Author
December 18, 2020 at 8:16 am
This is a very common misconception. Zoom/Crop factor has nothing to do with it. It's all about the pixel size and the "actual" focal length of the lens. The reason so many people are misled by this is that most APS-C sensors have much smaller pixels than their full frame counterparts. Times are changing though, and full frame sensors are coming out with extremely small pixels in the race for "more mega pixels". This is going to re-equalize everyone's rules of thumb I think. I'll stick to my method, which is take an extra 60 or 90 seconds and just test how long I can go.
You must be logged in to post a comment.
Heinz Laab
March 4, 2021 at 8:58 am
You say, higher ISOs restrict the available brightness range.
I just did a series of overexposed images from ISO 100 to ISO 12800.
The goal was to find out the maximum value stored in the RAW of my Canon 6D Mark II with RawDigger software.
I was surprised to see, that @ ISO 100, 125, 200 and 250 the maximum value for R, G, B and G2 is 15.871, but for ISO 160 it is an average of 13.118.
The next group of ISO is 400, 500, 800, 1.600, 2.000, 3.200 and 4.000 with a maximum of 14.335 wheras ISO 1.250 has a minimum of avg. 11.897,5.
How can that be?
You must be logged in to post a comment.
Richard S. Wright Jr.Post Author
March 7, 2021 at 11:38 am
I think it's great that you are doing experiments with your DSLR to see how it's changing the data at the different ISO's. Be sure and see some of my other blogs on the topic of ISO as well.
"Your milage may vary" is an appropriate term for how each DSLR may store the data numerically. However, you cannot count on the numbers meaning the same thing in terms of the actual brightness captured. A long exposure at a low ISO and a short exposure at a high ISO may give you similar numbers, but the actual brightness received by the camera is not the same, nor is the actual range of brightness from dimmest to brightest features. This blog in particular tries to explain a bit about how this works:
https://skyandtelescope.org/astronomy-blogs/imaging-foundations-richard-wright/astrophotography-bits-bytes-dynamic-range/
You must be logged in to post a comment.
You must be logged in to post a comment.